Showing posts with label Child's birthday. Show all posts

Monday, June 4, 2018

Another Joyous Occasion for Aurora Wings


It's time for the mid-challenge inspiration on the Aurora Wings Challenge Blog and we're celebrating Joyous Occasions.  This time my occasion is a little more off-beat, but definitely joyous!  Can you think of anything more fun than getting a NEW PET?  (Preferable a kitty, or two, or three, but maybe that's just me.)  I've used the adorable Can I Keep Them, currently available exclusively HERE at AuroraWings.com and geared it more for a child, using cute paper from an old Heidi Grace stack that reminded me of a child's drawing or book illustration.


Here's a close-up of Can I Keep Them.  I've colored with Copics with a little bit of fur detail from my Prismacolor pencils.  I still remember picking out my first kitty for my 4th birthday and having the hardest time with all those cuties running around.  I finally decided on a little boy I named Twinkle.  I was soooo excited and happy!

The kitties at her feet are Kitten Smitten Shape Sprinkles stickers from Doodlebug.  The colors and expressions seemed to match the image kitties and to be honest, I could only find that scrap of grass on my desk and the dies were nowhere to be found (at least for now) and they helped fill up some space in front of the MS fence I'd punched.  Anyway, the more kitties the merrier, in my book, but the harder to choose, for sure.


Since I'd printed Can I Keep Them so big, I used Spellbinders Grand Oval for the upright scene, but did not have paper large enough to cut the base of the easel with the ovals, as well.  Instead I used Grand Circles but had to trim a bit for the edges not to show from the front.  The fence goes all the way around the oval matting and is attached to the back.


The sentiment is a sticker from Echo Park's Meow Pack.  It's popped on foam to hold the easel upright.  The first line is hard to read because it's so light, but says "I just want you to know".  This could be referring to the chosen kitty, and in fact, my Twinkle was indeed a Siamese, like the one there, but it could also work as a birthday card for a kitty loving little girl.  You could easily add a "Happy Birthday" Sentiment under the little paper clip sun (also Doodlebug) at the top of the oval, if you wish.


Finally the entire card does fold pretty flat as the only popped elements are the mat on the oval and the sentiment on the base.  Both the fence and the sweet girl can be pushed to either side to flatten further for mailing.  (I've fashioned a strip of cardstock into an open rectangle to put behind her head to keep her in line with the fence where she is attached at the bottom.  So there ya go.  Took a bit of unexpected engineering but I'm pleased with the outcome.

Please be sure to check out the Joyous Occasions my fabulous Stella DT sisters are celebrating on the AWCB.


Here's how to keep up with all that's happening at Aurora Wings.

Aurora Wings Challenge Blog (current challenge runs through June 16th)

I'm adding this to the DL.Art June Linky Challenge, Lil Patch of Crafty Friends #84 AG, the Outlawz Twisted Thursday AG/AG, 2 Crafty Critter Crazies #15 AG w/Critter, Jo's Scrap Shack FFC#236 AG (3/3), A Bit More Time to Craft #69 AG (U), World Wide Open DT Challenge May 15 AG 2/3), Classic DT Open June #26 AG, Simply Papercraft #58 AG, Crafting With Friends #68 AG (3/3), KBD #119 AG/optional Congrats, QKR Stampede #298 AG, A Perfect Time to Craft Open #06 AG, CCK Inspiration and Challenge June Cats or Dogs, Crafty Animals June #15 AG/w animals, Crafty Girls Creations June #48 AG (1/3), Colour Crazy Challenge #21 AG/w coloring (2/3), Creative with Stamps #27 Cute Animals, Die Cut Divas June Animals or Pets, Fabrika Fantasy June #21 Animals, Creative Crafters #4 AG, 613 Avenue Create #210 AG, Simon Says Monday All Things Bright and Beautiful, Dare 2B Artzy Bright Colors and SUYP (cats only) challenge #30 Furrything Goes.


Monday, September 1, 2014

New Challenge at The East Wind


Our new challenge starts today at The East Wind.  The first of the month, the DT always uses the fab Freebie fans receive when they sign up for the newsletter. Have you signed up yet?  Click on the right of the sidebar on The East Wind Challenge Blog and this sweetie will be yours.  Our new challenge is Birthday Princess and any girly birthday project is eligible.  Be sure if you've used an East Wind digi that you link up twice, once to your post, and once to your blog for that extra chance to win.  I've made a princess wand for the Birthday Girl using two stars I cut with my Cricut with George and Basic Shapes and scored and shaped as explained HERE in The East Wind Showroom.


Here's a closeup of the adorable Baby Aurora Birthday Princess, colored with Copics and framed with a word surround done in my Greeting Card Factory program. She's cut and matted with Spellbinders dies and adorned with adhesive gems. Be sure to check out the fabulous inspiration by my teamies and come play along with us.  And don't miss the current FB Arrgh...Pirates Contest going on now through Sept 17th on The East Wind Group FB page.

I am entering this in the Anything But a Card "Five" challenge (5 points on the star), The House That Stamps Built Celebrate Birthdays, Little Red Wagon Girl Power, Divas by Design Happy Birthday, Simon Says Wednesday ATG and Fab 'n' Funky For the Kids.

Thursday, January 23, 2014

Bugaboo Bingo and Kidding Around


Well, I've finally managed the very first challenge (Bingo) for the Bugaboo 4th Birthday Bash.  Don't know why this one was so tough to finish.

 I've used the diagonal from bottom left, Bugaboo Image, Free, and Ribbon with the adorable Bugaboo image from Kidz-Girl and Cat.  She's colored with Copics and cut with Nesties.  Sentiment is computer generated.


The paw print ribbon follows the Bingo diagonal as well, with a bow with a kitty face brad in the center.  Inside it says (or will, when I finish it) "Purr-fect".


Next up is today's Bugaboo Just Kidding Around challenge, meaning a Birthday project for a child.  What's better for a kiddle than something from Dr. Suess?  This Birthday card uses the fabulous Bugaboo Cat in Hat-Youer Than You Digi.  I've colored it with copics, and fussy cut the image.  the background is embossed with the Cuttlebug Happy Birthday Folder and the die cut candle (shich I've extended and striped with Copics as well, is from the Cuttlebug Birthday Candles combo set.


Too make it all the more fun I've popped the digi on an Action Wobble.  Woohoo!  Only one more challenge to go and I've done them ALL! 

Friday, September 14, 2012

Dilly Beans Robots with CTMH Artiste

Well our challenge this week at Dilly Beans is Robots, and it seems I just can't get enough.  I had this ancient Scenic Route DP I'd been hoarding and thought it would make an adorable party invitation for a boy.  I used #436 Gear Robot, #435 Sparks Robot, and removed the frame from #437 Bolt Robot Framed so they would all look alike.  They are colored with Copics and the sentiment is computer generated.  The invitation pocket and invitation itself were cut on the Cricut with my CTMH Artiste cartridge.  (Can't seem to get enough of that either.  LOL)
Here's the shaped invitation pulled out of the pocket (also cut with Artiste). That happy guy is #439 Wired Robot Framed.  Doesn't he look excited!  I used DS to fit a gear from Artiste to fit over the mat.  The bolts were punched from a piece of mat metallic card stock that was embossed with one of the Cricut Companion Robotz set.  I stacked the embossed punches with plain ones to give them dimension since I didn't have appropriate brads both here and on the front corners of the mat.  Kinda loved how that turned out and cheap, too.
The back side of the invitation has the room for the pertinent information as well as some cool gears, also cut from Artiste.  Like I've been saying all along, there's something for everyone on this cartridge. (Steampunk, anyone?)  I finished the back side of the pocket envie with the embossed cut out from the Cuttlebug Cogs and Wheels Embossing Plus folder.  Be sure to stop by Dilly Beans Challenge Blog to see the rest of the DT's fab creations and the Shop to see all of the new Halloween stamps and MORE Robots.  And if I haven't convinced you with my projects, please visit my dear friend and DT sister Susan's Blog to see more great example of the fabulous things you can do with this cart.  View more cool CTMH stuff HERE on her website.

Although this isn't as elaborate as most of my shaped cards, I'm also entering this in Charisma Cardz Shaped Card challenge (and thank them very much for choosing me among the Top 3 last week), Divas by Design for a Child, Celebrate the Occasion Getting in Shape, Use it Tuesday Anything Goes (my beloved Scenic Route DP which I still shudder thinking that I actually CUT into it!), and Hooked on Crafts Cards for Men (I'm assuming boys are ok since the DT had boy cards, too).

Wednesday, July 20, 2011

Woo Hoo! My Third for ADFD


I still can't believe I've completed three! Here's my third and final offering for the A Day For Daisies 300 member CDAC party. I've had so much fun with this challenge. The free images were just adorable (scroll down for my earlier post from today and the first from Saturday) and I actually managed to color two of them today, with Copics, of course. This one is all girly and sweet. It makes me think of a first birthday card because of the single candle so I used the DCWV Nana's mat stack. The image is cut with my oval Nesties and the mat is the Crowned Ovals inked with Smeared Lipstick Distress Ink.


I popped the mat and image for dimension and added punched photo corners (EK Sucess).

The ribbon is from Prairie Bird Boutique (thanks Steph!) and the little bear charm was a bargain from M's and actually has a clip that you can detach and put on a bracelet. Too cute! If you've never visited the A Day For Daisies Store, you must. The images are just precious and there's something for everyone. If you prefer Etsy, you can buy them HERE too. I'm also entering this in The Shabby Tea Room's So Charming Challenge. Now it's time to rest my eyes. We've still not figured out the right contact prescription for both far and near and I have to wear readers over my contacts to color. It's a bitch being old!


Another A Day For Daisy Card


I'm playing along with the ADFD 300 member celebration on CDAC and this is the second card I've done. Members had the chance to download as many as 3 sweet images and are making cards for a chance to win prizes. I really love A Day For Daisy digis and these freebies were especially cute. I might have missed the party had I not subscribed to the ADFD blog by email, so if you love ADFD, I suggest you do. I knew exactly what paper I wanted to use when I saw this image. It's an oldie from DCWV and thought it would be cute for a boy. I colored the image with Copics (so much easier when you've chosen your paper FIRST) and used my Nesties Circles and Beaded Circles for the frame. Both are inked a bit with Distress.


The stars are also Nesties and I added some punched photo corners (EK Success) for balance. I popped a little bit for dimension and the pretty adhesive beads are by K&Co. I'm really enjoying this birthday celebration and it's fun seeing what others have done with the same images you are using. You can take a look HERE. I'm also entering it in the Cute Card Thursday Going Round in Circles Challenge.

Monday, March 28, 2011

BBTB2 Disney Challenge and Blog Hop!


Woohoo! It's Blog Hop time again at BBTB2 and this week we're hosted by my dear and fabulously talented friend, Maria. In honor of Spring Break she's chosen a Disney challenge, hopefully using one of the new carts, but hey, any Disney cart will do. If you've come from dear Carole's blog you're on the right track, but if you'd like to start at the beginning, hop back to BBTB2 so you don't miss a thing. I really find the Disney characters intimidating so this is actually the first one I've actually cut and assembled. This is Figaro from Pinocchio on the new Disney Classic Cart. I love the surprised look on his face so I added the "Oops" sentiment by welding letters from Mickey Font. I added striped twine from the Twinery to the "O's" to make them look like balloons thinking this would make a cute belated birthday card.

It's a shaped front card (again) with a rounded rectangle from George welded in Design Studio. All of Figaro's layers were cut in white card stock and colored with Copics, even the black. Once I'd colored the other parts, the solid black card stock looked too one dimensional and I was able to add a teeny bit on shading coloring it all with my Copics even though it still was essentially black. The inside striped mat was from the DCWV Summer Glitter Stack from awhile back. Yikes! How bright! Definitely a kid's card, eh?


One this I find particularly challenging with the Disney characters is they are not particulary conducive to the type of dimensional layering I like to do. I thought I was gonna be okay with that, but after gluing on all the the features it just looked too flat to me. To remedy that, I actually cut apart the character using the layer placement cuts and popped the head, bow, paws and legs on top of the solid black cut and then popped the entire kitty on the card base. Definitely better, but wished I'd thought of this before I'd glued down the chest fur or that would be popped too. Next stop is Theresa's Blog and wait 'til you see the magical layouts she's created! WOW! but before you go, don't forget to leave a comment for a chance to win a $40.00, yes, you read that right, a $40.00 gift certificate to Custom Crops!!! Thanks so much Custom Crops for being such a generous sponsor. BTW, Custom Crops currently has the Disney Classics cart on SALE for on $27.00! In fact nearly ALL of the Cricut carts are on sale as well as regular Cricut mats for $8.00 and Imagine mats for $9.00 so be sure to check out Custom Crops for all of your Cricut needs.

Tuesday, January 18, 2011

The Cuttlebug Spot Inspired by Children's Games


We're being inspired all month at The Cuttlebug Spot and this week it's by children's games. I've chosen Twister because I've always loved bright colors against a white background and dots to me mean PARTY! The background is embossed with the 5x7 Polka Dots Cuttlebug folder, and the 24 colored dots are embossed by the various textures from the Snow Fun 3x3 combo.
I actually punched the dots because it was faster, and I was able to emboss 4 at a time using the folder like this. Easy, peasy. (The hardest part was gluing them on straight.)
The birthday 'prise ( read "surprise") is cut twice from the Beautifully Boxed 3x3 combo. The yellow ribbon is cut and pasted directly over the white for contrast. I was really happy with the simple design that I think would work for guys or gals of any age. The DT came up with some really creative ideas so be sure to check them out HERE and play along for a chance to win a $20.00 gift certificate to Custom Crops.

Saturday, January 8, 2011

Happy 2nd Birthday Charisma Cardz Challenge


So I've had loads to do to get ready for a dinner party tonight and hadn't planned on crafting at all the past couple of days. It does take me awhile to wake up though, and I popped in on my dear friend and DT sister Julia's Blog yesterday morning and saw the blog hop for Charisma Cardz Challenges and decided to hop along. It was a super hop and at the end I saw that you must complete the current challenge to be eligible for the prizes (and WOW what a list of prizes!) so I thought I'd make a quickie and join in. The challenge is a birthday/celebration card and you get an extra entry if you incorporate the number "2". I checked out my digi stamps and the first one (that was easy to color) was this adorable Pure Innocence by Heather Ellis.
Now I really didn't have much time and I usually spend hours looking for paper but as I was browsing my files I came across the Colored Birthday Background printable stamp from The Cutting Cafe and thought it would be perfect. I did something a little different this time when printing my stamps. I knew I wanted to do a Nestie frame around my image so I measured the rectangle and sized my image accordingly, but instead of printing the image and the background separately, I just plunked it right on the background and printed it as one piece. (That made for a little added pressure on the coloring front, but I thought this image would be hard to mess up and the colors I wanted to use were right there to look at. WooHoo!) The circle sentiment is from the Assorted Celebration Word Circles, also from The Cutting Cafe and I added the epoxy "2 U" and a little ribbon garnish. the border punch at the bottom is the old favorite Threading Water by Fiskars. Happy 2nd birthday Charisma Cardz Challenges. I'm sure I'll be playing along with again.

Monday, July 26, 2010

BBTB2 SYI Ice Cream Cone Cut and Blog Hop


Happy Monday everyone! I'm winging my way to Chicago for CHA as we speak but I managed to do a couple of DT things before I left. If you've arrived from Joanna's Blog, you're on the right track. If not, you may wish to start at BBTB2 so you don't miss a thing. This week dear Krista chose the ice cream cone cut from Stretch Your Imagination. I chose the silhouette feature and decided to turn it upside down and make a clown. I actually cut the whole thing in white card stock and colored it with my Copics. I welded a bowtie shadow cut from Paper Dolls to the bottom where the cherry is and cut off the stem. I also cut another bowtie in shadow and regular, glued them together and cut it in half for ears. I drew the eyes and smile and added a pom pom nose, another tiny one on the hat, and a big ribbon bow. The sentiment is a metal adhesive one from the $ bins at M's, colored black with a permanent marker.
The circle easel card is actually done with my Nesties. I saw a cute one on Kellie's Blog with a tutorial on Debbie's Blog, my Aussie friends from Tickled Pink Stamps. Thanks guys! I added mats done with Nesties Pinking Circles and embossed the yellow ones with the Spots and Dots Cuttlebug folder. This makes a fairly tiny card, but I thought it would be cute to brighten someone's day for a birthday or even a child's get well card. A larger one could certainly be done using Design Studio. Now on to hop to my dear friend Carole's Blog (it's her birthday week so be sure to leave her some love!), but before you go, please be sure to leave a comment for a chance to win a $30.00 gift certficate from Custom Crops. The winner will be announced Friday (if I don't forget since I'll still be away) so keep on checking back. And all of you attending CHA, please stop by the Custom Crops booth at the Super Show and say "hi"! I'll be doing Make and Takes there both Saturday ad Sunday and would love to meet you in person.

Tuesday, July 13, 2010

The Cuttlebug Spot Sketch and Caardvarks Birthday Challenge


This week at The Cuttlebug Spot we are using a sketch designed by our own Aymee and it's our choice of theme. I changed it up a bit (I'm so proud of myself because I'm usually too intimidated to switch anything out, LOL) I used the birthday candles folder from the Cuttlebug Birthday Greeting Card Making Combo and the large dots are a Quickutz folder. The adorable birthday girl is a Pure Innocence digi image from Heather Ellis. She's colored with Copics and cut out with Nesties and popped. The sentiment is computer generated. The border punch is Martha Stewart and love how it embosses as well. Be sure to pop over to The Cuttlebug Spot and take a look at the rest of the Design Team's interprtation of this fabulous sketch and why not have a go of it?

I'm also entering this card in the Caardvarks Birthday Challenge. They are helping My Favorite Things celebrate their 4th birthday. WooHoo! I recently became a real fan of MFT after winning a challenge at Oh Alice! They have fabulous stamps (among other things) and Pure Innocence is one of their lines. Happy birthday MFT and here's wishing you many, MANY more!

Thursday, June 17, 2010

Two with Tiddly!


Father's Day is really a tough time for me. I will always be a Daddy's Girl but I lost him 5 years ago to Alzheimer's. When I saw this adorable image at Tiddly Inks (called apppropriately "Daddy's Girl") I HAD to have her. I think I cried the whole time I was making this card but I really love how it turned out. (I'm not doing that good a job holding back the tears while typing either so if I'm messing up, sorry.)

After cutting her out with my Nesties I finally decided on an easel card so the sentiment will always be visible. The papers are from Miss Elizabeth's and unfortunately I don't know who did the plaid, which I picked out first, as it inspired the entire color scheme.

The letters for Daddy are stamped with an old set from Stamp Craft and cut out. She's done with a combo of paper piecing and coloring with my Copics, with the hat, tie and shoes colored again and popped.

The sentiment is computer generated and is how I will always feel. I love you Daddy and miss you very much! This is my second entry in the Cards for Men Father's Day Challenge, my first for the One for the Boys Cupcake Crafts Challenge, and it's been way too long since I've entered a challenge at A Crafty Little Place, #34 also One for the Boys.

On a lighter note, on the Tiddly Inks Challenge Blog this week the challenge is Bleep, Bleep Boys and Their Robots. I got both the adorable images FREE from the Tiddly Inks PCP Group. WooHoo! Roboto came already colored in the freebie but he is available for purchase uncolored along with tons more adorable robots and other cute boy stuff Here. The free pressie was not colored so I printed it a couple of times and used my Papertrey Ink Distressed Stripes Clear Stamps I got from my dear friend Leah for my birthday to do the wrapping and then colored and cut and popped the bow. I love the fact that you can resize digis so I made the present large enough to turn into a shaped card and then just folded some cardstock, traced around the image with a bit of a shadow, and hand cut it with scissors. The little paper clip letters came from JoAnn's. The letters seemed to easily be popped off the clips (I found this out quite by accident, LOL) so I glued the o and r under the f on the first clip with glossy accents. I thought the square letters tied in perfectly.
The entire present was popped on the card base as was the ribbon on top of the colored pressie. Roboto was popped a bit higher and his shoes and one of the balloons were cut out and popped as well. LOVE that dimension! I love these challenges so much! If you've never worked with digis before and are unfamiliar with Tiddly Inks, this is a perfect challenge to get your feet wet since the images are available FREE for this one just by joining the Tiddly Inks PCP group. In fact every Tues there's something FREE being offered there so what are you waiting for?

Friday, May 7, 2010

Oh Alice! and the Burtonesque Dolls


Oh I can't believe it's Friday! The week is going by sooo fast and I've still got loads to do for next week. Couldn't miss this week's Oh Alice! challenge though, entitled "Little People, Big Wonderland" (which translates into make a card or project for a child.) I thought these adorable Wonderland digi images from The Greeting Farm would be perfect...so sweet! They're colored with Copics (before daylight so excuse that please) and popped on "Baby Boy" DP from Heidi Grace. The sentiments Sassy Studio Designs cut and mounted on petite oval Nesties. The punch is EK Success which I would love a whole lot more if the little embossed dots on the scallops showed up better but I tried to enhance them with my stylus.
I'm also entering this in The Burtonesque Dolls FIRST challenge (WooHoo!) which is stripes. Now normally I'd be trying to do something a bit more edgey for that, but with limited time and figuring at least it's an Alice theme which is currently my FAVE Tim Burton movie, I thought it would be okay. Several of my BBB's (Best Blogging Buddies) are on the DT there so I wanted to show my support for this FABULOUS new challenge blog. New Burtonesque challenges come out every Tuesday there so you still have time to play along.

Thursday, October 8, 2009

Teen Queen


Tonight I'm meeting my BFF and her daughter Hayley for our annual birthday shopping trip. For the past 5 years "Aunt" Donna has allowed Hayley to choose her own outfit and we have some fun while she tries on all sorts of things and models for us. Then it's girls night out for dinner. WooHoo! This year Hayley turns 13 (going on 30), so she's FINALLY a real teenager. I just finished her card. She's always been a "pink girl" and loves her plaids (a la Juicy Couture). This shaped front card is a combo of DonJuan, George and Happily Ever After.
Lots of layers and dimension. I've started to make my own pop layers that I can cut in strips or any size I want by running 1/16th" foam through my Xyron. Thank you Lillie. I still often buy the white and black in 1/8th" but now I can have the thin ones in any color I want (almost). The crown was also run through the Xyron right side down and glittered with Doodlebug Sugar Coating. I used lots of adhesive beads and pearls too.
Here's the inside printed from my computer on hearts that match the front so they won't show from the outside.
Here's another of my Handmade personalized printed stamps from The Cutting Cafe. I'm so happy to finally have something pretty for the back of my cards. I added the tiny hearts from a $1.00 punch from M's. Well I better get going and finish the envie. xxD

Wednesday, July 29, 2009

Make a Wish ,Cut file Available


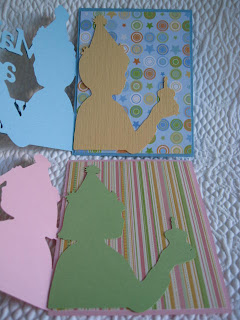
I just love the New A Child's Year cartridge so I decided to make a few simple birthday cards. They are A2 size which is small for me, but I thought it would be nice to have something that is easy to send for a change. They are a Design Team project for Custom Crops and the article and .cut file are available HERE. They also only require 2 carts, Plantin Schoolbook and A Child's Year.


For the inside I mounted another silhouette right behind the shaped front to stamp or write a sentiment.


I thought the images would be great for layouts or also make cute tags so I included the cuts without the card backing as well. I like these cuts even without the patterned paper and embellies. Just a little embossing and doodling and I was good to go.