Thursday, April 30, 2009

The Cutting Cafe Meets Peggy Loves Vintage


I really enjoyed the BBTB challenge using the adorable images from Peggy Loves Vintage and had a hard tome choosing which one to use for that challenge. All of them were sooo cute so I had to make another card this time using the circus image. The round shape made me immediately think of the Happy Birthday downloadable stamp set from The Cutting Cafe because I thought the circle frame would be perfect. I cut the card on my Cricut using the Doily card in blackout from Wildcard. I printed the circle frame on cardstock, cut the outside by hand and discovered that I had a Nestie circle that would cut out the inside perfectly. WooHoo!


I printed the Peggy Loves Vintage image 3 times because I wanted to use the decoupage technique to add dimension and added tiny pompoms to the clown's shoe and hat. I just love the funky pinata paper from the cupcake collection by Basic Grey and thought it was so festive and looked great with the image.

Regina's downloadable stamps are so easy to work with and I'm particularly fond of this set because it has cute sentiments as well. I think this one is my favorite. I cut it out with my Nesties label 4 and backed it with 2 presents cut and embossed with my Cuttlebug combo and a Nesties scalloped octagon. It's so much fun using these downloadables for a card because you can finish a card in a jiffy with truly amazing results. Peggy Loves Vintage had CD's of darling designs for all occasions. And while you're at the Cutting Cafe be sure to check out the fabulous All About Mom set that's available too! There's still time for Mother's Day, but this set would be great all year long.

Tuesday, April 28, 2009

The Cuttlebug Spot "Time for Tea" challenge


This week on The Cuttlebug Spot we were challenged to use the technique of tea bag folding. Little squares of paper are folded and combined to make lovely shapes and add a new excitement to cards and layout pages. Our Design Team Sister Steph as a fabulous tutorial on her blog for this fun and exciting technique so click HERE to view it. There is also a site that offers tea bag tiles to print and cut out if you'd like to use coordinating patterns. That is what I did for this challenge. Click HERE to go to that site. I am back to using my Nesties for a frame for my tea bag folded star. The background is cuttled with Swiss Dots (honestly what would I do without it?)

The pattern I chose reminded my of the Blue Onion china pattern so I used my QuicKutz tea set die exclusive to The Scrapping Cottage. (No I don't work for them, I just can't resist their stuff! LOL) I cut the handle, spout, base and top twice to give it a bit of a shadow and used Swiss Dots (again) on the main part of the pot. "Hello Friend" is from the Cuttlebug Friends Forever combo underlined with the zigzag border. Please be sure to stop by The Cuttlebug Spot to view the fabulous designs from my teammates and Please come and play along. This was so much FUN!

Monday, April 27, 2009

BBTB Doodle Charms border feature challenge-"Popsicle Toes"


What a fun challenge this week at Bitten by the Bug! Regina chose the border feature from Doodlecharms and it was our choice! Of course I couldn't resist the popsicles so I made my own little "Popsicle Toes" card by welding mutiples of the border popsicles to the feet from New Arrival and a rectangle from George.


The sentiment says "are always froze" which are words from the song my Michael Franks. (My fave version has got to be Diana Krall's) "Froze" is welded in Design Studio using Mickey Font and "are always" are from Opposites Attract. I added the Brrr... from Graphically Speaking to balance the design.
I used the little wooden stirrers from Starbuck's for the sticks and added Glossy Accents to the popsicles to make them look like they were melting. I also did that on the Froze and Brrr... but added some glitter on top so they still looked "froze". (Hmmm... why didn't I just use stickles?)
Of course I used a wad of dimensionals and some fun adhesive gems. I also tried to chalk my toes a bit blue which is the way mine ALWAYS look no matter how warm it is. LOL

Be sure to stop by Bitten By the Bug to see all of my Design Team Sisters' fabulous creations. We are even having a blog hop with some candy being offered. Sorry I was caught a bit off guard because of my Birthday today so I sorta dropped the ball on this but there's lots to be had so go check it out and please play along.

Friday, April 24, 2009

Paper Blooms Challenge 4


In honor of Earth Day the Paper Blooms challenge this week was to alter or use something you'd normally throw away. I've been saving these octagonal jars that yummy olive spread comes in because I love the size and shape. Happily in the mail today I received my latest Paper Blooms order with Leah's new daisy shaped hand crocheted flowers so I just HAD to use one. Isn't it gorgeous!?!

I found a tiny spool of adorable blue and yellow ribbon and the color scheme was born. The lid cover I did with my Nesties, used my Threading water border punch for a band and some blue and white gingham ribbon and tiny yellow buttons around the jar. I finished it off by layering another of Leah's blooms and tiny blue button in the centerof my new daisy. I think I'll keep it to store either buttons or Paper Blooms. I'm loving this new challenge blog and you don't have to use Paper Blooms to play along but since I've been ordering up a storm I can't help myself.

Wednesday, April 22, 2009

Caardvark's "Tree's a Crowd" Challenge


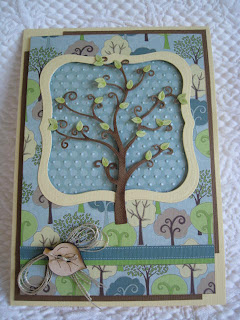
Happy Earth Day! I decided this was the perfect day to work on the current challenge over at Caardvarks. I had a new Cottage Cutz tree die from The Scrapping Cottage and was dying to use it. I originally planned to do something all Springy and floral when I came upon my rather neglected Green Stack from DCWV. PERFECT! How more Earth friendly could I get? I'm afraid I'm rather stuck on these popped frames lately but I couldn't help using my Labels 1 Nesties set. The colors turned out to be fairly masculine so I restrained myself on the embellies and chose not to use a sentiment to keep it versatile but all in all I don't think it turned out half bad.

Tuesday, April 21, 2009

Paper Blooms Challenge 3 and 2S4U


WooHoo! another multiple post day. That can only mean I'm running late for a challenge. LOL I find it really tough to recover from a vacation and get back into everyday mode. Still I didn't want to miss this week's challenge at Paper Blooms. Leah challenged us to use the 5 "B's"; blooms, bling, butterflies, brown, and a sentiment that began with "B". I had perfect paper to go with Leah's gorgeous hand crocheted blooms but I was at a bit of a loss for a design. One of my New Year's resolutions was to get comfortable with sketches so I hopped over to 2 Sketches 4 U and lo and behold Laura's sketch 24 did the trick. I'm hardly what you'd call creative with sketches, but I think it turned out alright. I may even get the nerve to post it on the site. LOL

I used my threading water punch and wrapped the strip in plaid and thin gingham ribbon, used my Cuttlebug emboss/die combo for the butterfly, my Nesties and a Melissa Frances rub-on for the sentiment and pink rhinestones for the bling. Voila! Just under the wire for Paper Blooms, and EARLY for 2S4U.

The Cuttlebug Spot Takes the Cake


This week at The Cuttlebug Spot we were challenged to use a cake or cupcake on our card. I chose the cupcake from the Doodlecharms Cricut cartridge because I thought it fit nicely in the octagon frame I did with my new Nesties. The background was cuttled with the Happy Birthday folder and the plaid foreground with Swiss Dots. The cupcake frosting used D'Vine Swirls highlighted with stickles and I ran the holder through the crimper. I used the cuttlebug Birthday Greetings combo to cut the sentiment twice, and an EK Success border punch along the bottom. Be sure to take a look at the all of the yummy cards my design team sisters created for this challenge and there's a fun prize if you want to play along with The Cuttlebug Spot.

You Made Me Smile! Thank you Margie!


My sweet friend Margie gave me this adorable award and I couldn't be happier. With so much going on we haven't been able to connect nearly as often as we like. I treasure her friendship and sincerely hope she finds something to smile about each and every day! I agree with her that all of the blogs I visit make me smile but since I can only choose five I will pass this along to Lillie, Caryn, Leah, Susan, and Heidi. Be sure to click on these talented ladies names to go straight to their blogs and you'll be smiling too!

Monday, April 20, 2009

And a Great Time Was Had By ALL!


I'm BAAAAACK! Had to throw in a few pics of the gorgeous place we stayed on our girly getaway before getting back to the crafty business. Tell me this house isn't to die for! It's the Mendo House at Irish Beach on the Northern CA cost about 30 minutes from Mendocino. Those ocean views are from the deck and let me tell you that sunset in the hot tub with a glass of wine is breathtaking! (No pix though, afraid of dropping my camera in the drink and neither Lisa nor I wanted any incriminating bathing suit shots. LOL) We had SUCH a marvelous time!

BBTB Meets Peggy Loves Vintage


Just had to borrow that post title from my DT sisters Sharon and DeeDee because it's perfect! This week at Bitten by the Bug Regina had us combine the lunchbag cut from TBBM with an adorable image from Peggy Loves Vintage. These are the coolest images and are soooo very nostalgic to me being a child of the fifties. (OOps, don't tell!) Anyway I had a hard time choosing which design to use but this new baby one reminded me of some of the cards I had in my baby book. And yes, it also inspired me to dig around a bit in my attic and pull out a "vintage" toy and dress for staging purposes. (I was an only child so my parents kept EVERYTHING! LOL)

Because the it is printable I decided to make several copies and cut out parts for dimension like a decoupage image. I used a chipboard glitter star and tried to dirty it up a bit and organdy ribbon to wrap the baby in. The pleated organdy trim that backs the entire image and made the handles was in the $ bin at M's. (Loved it so much I bought in about 7 colors!)


I thought the designer paper from Tracy Porter had a bit of a vintage feeling as well. The bag is cut at 7 1/4" which is the largest you can do on a 12 x 12 mat. I REALLY enjoyed working with these fabulous images from Peggy Loves Vintage and will be sure to order some more. She even has her CD's at $2.00 off the regular price at the moment with free shipping and is offering downloadable versions as well. Click HERE to check out all of her fabulous collections. Also be sure to hop on over to Bitten By The Bug to see what my fabulous Design Team sisters have done with them and come and play along. There's also an exciting new contest that is sponsored by Peggy Loves Vintage and she generously has offered two of these fun images to use for free! The new contest ends May 6 so you've got two weeks to play. WooHoo!

Wednesday, April 15, 2009

Sweet Baby Boy Card


This sweet little card went pretty fast and was sooo much fun to make! I guess I have bears on the brain (actually I have a fabulous collection of artist made teddies all over my house) so I just couldn't resist using this adorable die from The Scrapping Cottage. It's a Cottage Cutz die made exclusively for them by Go Kreate. I cut him twice, once out of white cardstock and once out of blue and white gingham and glued them together slightly offset and popped two of his legs and his head inside an oval cut with my Nesties. I used my threading water border punch on the blue mat and cuttled the top mat with Swiss Dots. The scalloped blue oval frame is also done with my Nesties and "It's a Boy" is spelled out in alpha beads.
I'm sorry that this will be my last post until Monday because I'm leaving for an all girls weekend with my BFF Lisa, her daughter Hayley and her BFF. We've rented a gorgeous house on Irish Beach up near Mendocino. No crafts, no internet. Our hubbies are backpacking and we're thrilled to be able to relax in the hot tub, shop, eat, drink, and do girly things. WooHoo!

Monday, April 13, 2009

The Cuttlebug Spot "Shape It" Challenge and Caardvaark's "Good Knight" challenge


This week at The Cuttlebug Spot we were asked to do a card with any shape other than square or rectangle. I have been dying to use the adorable Knight outfit for my Boo for You bear die so I designed a castle shaped card using Cricut Design Studio and the Doodlecharms cartridge.


I used Tim Holtz's grunge paper for the castle which is thinner than grunge board but still really flexible and cuts and embosses like a dream. I embossed the castle walls with the Tiny Mosaic Cuttlebug folder and the turret roofs with Diamonds in the Rough. They were inked and sponged with distress and chalk inks and metallic acrylic paint daubers and popped for dimension. Boo is and his outfit are dies from GoKreate, a UK company available in the U.S. at The Scrapping Cottage. "Celebrate"is an adhesive metallic sentiment I found in the $ bin at M's. It was so great creating a card for a male that wasn't a chore. LOL


Inside I used the Cuttlebug die from the Birthday Wishes combo with the knight's sword for the exclamation point. It just so happens that the Caardvark's challenge is "Good Knight" a fantasy theme. I think this fills the bill. Be sure to stop by The Cuttlebug Spot to see the other wonderful shaped cards my Design Team sisters have created and please come and play along.

Sunday, April 12, 2009

BBTB 24/7 Challenge


Happy Monday! Are we all nursing a chocolate hangover? This week at BBTB Regina had us use the 24/7 cut from Graphically Speaking. This really was a challenge for me. I tried designing a card as usual but it got so complicated and HUGE that I started over. Tried a layout but I'm NOT a scrapper and when I was done with the design I realized there was no room for a pic (not that I had one to use or anything). Finally an inspiration. Seems like I've been doing alot of altered items lately but I thought what do I like to do 24/7? (No not that you naughty minds!) I LOVE TO CRAFT! I found this inexpensive 11" wall clock at WalMart with circle cutouts for pix where the numbers go. Conveniently I LOVE TO CRAFT is exactly 12 letters so I used my new Hello Kitty font cartridge to cut it out on both shadow and regular at 1 1/4 inches and popped them on 2" circles from Plantin Schoolbook. I cut 24/7 twice at 3 1/2, punched a hole in the middle and glued it to the center under the hands. The little red metal flowers and black centers on the face are from J's as is the grosgrain ribbon I used to dress up the outside. Of course I had to add a bow and some Primas. Hope DH doesn't mind since I share my craft room with him and his computer. At least I won't lose track of time anymore. Please stop by Bitten By The Bug to see what my fabulous Design Team sisters have done with this challenge.
Regina also has a new contest sponsered by SweetArts Paperie going on now so click HERE and don't miss out. Also there's still time to take advantage of the EASTER SALE at The Cutting Cafe. Buy one file and get the second of equal or lesser value for FREE.Click HERE through April 14.

Paper Blooms Challenge 2, Take 2 and a Bit More Recycling


Happy Easter everybody! Hope everyone is having a lovely day. I just couldn't relax until I made another basket for the Paper Blooms challenge using Paper Blooms. LOL I eat ALOT of tuna in the pouch and whenever I go to WalMart I buy the entire box of it at a time. Inside these boxes is corregated cardboard for reinforcement and of course I've been saving it for crafting purposes. I took 2 of them and glued the center sections together, punched holes at the corners, tied some bows and VOILA! A basket! Used my threading water punch to trim the top and decorated it with some neutral primas and some of Leah's GORGEOUS hand crocheted flowers. For the handle I wound a bunch of raffia with some wrapped wire. I really love the mix of the rustic with the refined. I'm not a particular fan of hard boiled eggs but darling little quail eggs are a different story. Too bad they're such a bite to peel. LOL If you haven't hopped over to Paper Blooms you're really missing something. Leah and her Design Team have made some fabulous boxes and baskets for this challenge and one lucky participant will win some of Leah's beautiful blooms. Click HERE to go see!

Friday, April 10, 2009

2 for 1 Special at The Cutting Cafe!

WooHoo! I just got word that Regina is holding a 2 for 1 special at The Cutting Cafe now through April 14! Now's your chance to snatch up all those downloadable printable stamps and cool templates you've been eyeing with this buy one and get one of equal or lesser value absolutely FREE offer! Remember you don't need a special machine to use these items but if you have SCAL or a Pazzles machine so much the better-no cutting by hand. This is Regina's way of saying "Happy Easter to you all" with every single set available on this offer. And there's no waiting for shipping. She'll email you in a jiffy with your purchase. What are you waiting for? Click HERE to go shopping. If you'd like to see some of the fun stuff I've made with these fabulous stamps check out my sidebar and click on The Cutting Cafe.

Wednesday, April 8, 2009

Whimsical Easter Basket, Paper Blooms Challenge #2


Isn't it fun to Blog hop? You never know what you're gonna find. I hopped over to my friend Caryn's Blog Glitter Me Silly (she does the most amazing stuff!) and she had made the most adorable Easter treat container from a U Tube video she had found on SplitcoastStampers by JenLoweDesigns. Well of course I had to follow her LINK and knew I had to make one of these whimsical origami baskets for myself. Jen had several variations so I combined the handled basket with the "jester" basket and here's what I came up with.


I was thrilled to be able to do a project that would show both sides of the adorable Heidi Grace paper I had (I can NEVER decide which side I like best) and when it was done I immediately thought of Regina's adorable bunny downloadable template from The Cutting Cafe. The curved sides of the basket made me think of his floppy ears! This bunny can be made into a shaped card but I chose to print just the layers and attach him to the front and back of my basket. Then I printed "Easter Bunny Hugs" from the Easter Sentiments set. I'm really pleased to be on a roll with these Easter projects. It's been so fast and easy using the adorable downloadables from The Cutting Cafe. Regina has TONS of fun stuff for every occasion so be sure to check it out.


The trim was on clearance from J's and the glitter flowers are also Heidi Grace. Imagine my surprise when I hopped over to Paper Blooms to check out this week's challenge and lo and behold it was to make an Easter or Spring themed box or basket. This fun new challenge site is a real source of inspiration and has all sorts of ideas for using Leah's gorgeous hand crocheted flowers. If you haven't checked them out YOU MUST! I'm bummed I hadn't used any of Leah's beautiful flowers on my basket but I'd already committed. It is not a requirement to enter the challenge and one random lucky winner each week will win some (tell me that's not incentive!) so you have NO EXCUSE not to participate. LOL Hopefully I will have some time to make another basket using her lovely blooms but in the meantime this will have to do.

Tuesday, April 7, 2009

Paper Blooms Sketch Challenge #1


My dear friend Sandi knew I as unhappy with my card and made some suggestions. Above is the new improved card. I stamped the little flower that was hidden behind the lovely crocheted one twice and fussy cut them out. Yea! SUCH an improvement! THANKS SANDI!


Okay, don't faint or anything. Two posts in one day!?! Well I would have saved this for another day but I wanted to get it in for the very first Challenge over at Paper Blooms. It was a sketch challenge and you know me and sketches. LOL I think my problem is I have a really hard time deviating in ANY way from the sketch which I don't think is exactly the point (yeah I was one of those kids who always obeyed the rules in school). In fact it bugs the heck out of me that the lovely hand crocheted bloom on this card should actually be at the top left corner of the image but it looked stupid there with the stamped flower already on the side of the basket. So there you go. This was also a color challenge using lavender, green and white or cream. Check! The sweet bunny is a Stampin'Up stamp colored with my Prisma pencils using the MCPT and the sentiment circle is a downloadable printable stamp from The Cutting Cafe as is the inside sentiment. I happened to luck out this time and only had to stamp my bunny once (instead of 5 or 6 times) to get a clean image, but with Regina's printable stamps it's always a sure thing. Yea! I'm dying to use more of Leah's gorgeous flowers so I can't wait to see what tomorrow's challenge at Paper Blooms will be. And if you still have some Easter cards to make you can't go wrong with the fun stuff Regina has over at The Cutting Cafe. There's still time!

The Cuttlebug Spot Easter Basket/Bag Challenge


This week at The Cuttlebug Spot we were challenged to alter a bag or basket for Easter. I went rooting through my stuff to look for something, even purchased a cute pail, but while browsing the Martha Stewart website I came across this inspiration. (Pix and explanation to follow below.) After making the basket I used one of my 12x24 sheets of Provocraft cardstock to go around it with only 1 seam. The flower folder from the With Gratitude set is nice and even (like Swiss Dots so I was able to emboss all along the strip and the images matched up perfectly. The handle strip is the dotted border folder and the basket edging is the threading water border punch.


I did a bit of recycling with the grass (it's sushi grass LOL) and I added tons of primas with skittle centers. The adorable chicks are a Cottage Cutz die available exclusively from The Scrapping Cottage. I've gone absolutely nuts over these dies! SOOOOO CUTE! The panoramic "egg" is done with my Nesties and another packaging bubble from some brads. I cuttled both inside and out with D'Vine Swirls and Swiss dots and added some little beads for bird seed.


The little treat bag topper is cut with my Nesties Labels 1 and the egg is also a Spellbinders die. I just love the way you can use them as a stencil so I decorated the it with my metallic gel pens. This was one FUN challenge. Why don't you come play along at The Cuttlebug Spot and while you're there take a look at the fabulous projects my design team sisters came up with this week.

Monday, April 6, 2009

Paper Bag Basket


I actually thought about using a variety of different things to alter for this challenge but was browsing the Martha Stewart website and went to her gallery of Easter basket pictures. One was a simple basket cut from a brown paper bag. I had a bunch of white paper bags I had bought for a craft project years ago (and never did) so I thought why not alter one of those bags into a basket? It couldn't be simpler. Just cut right above the fold when the bag is lying flat toward the center from each side and stop when you've reached as wide as you want the handle to be. I used Martha's double scallop punch along the handle sides to give it a bit of detail. Open the bag and tape the handle in the center and you've got a basket. Then embellish away! Great way to recycle too!