
This week our fabulous
Shelly chose the clouds from Pooh and Friends for the
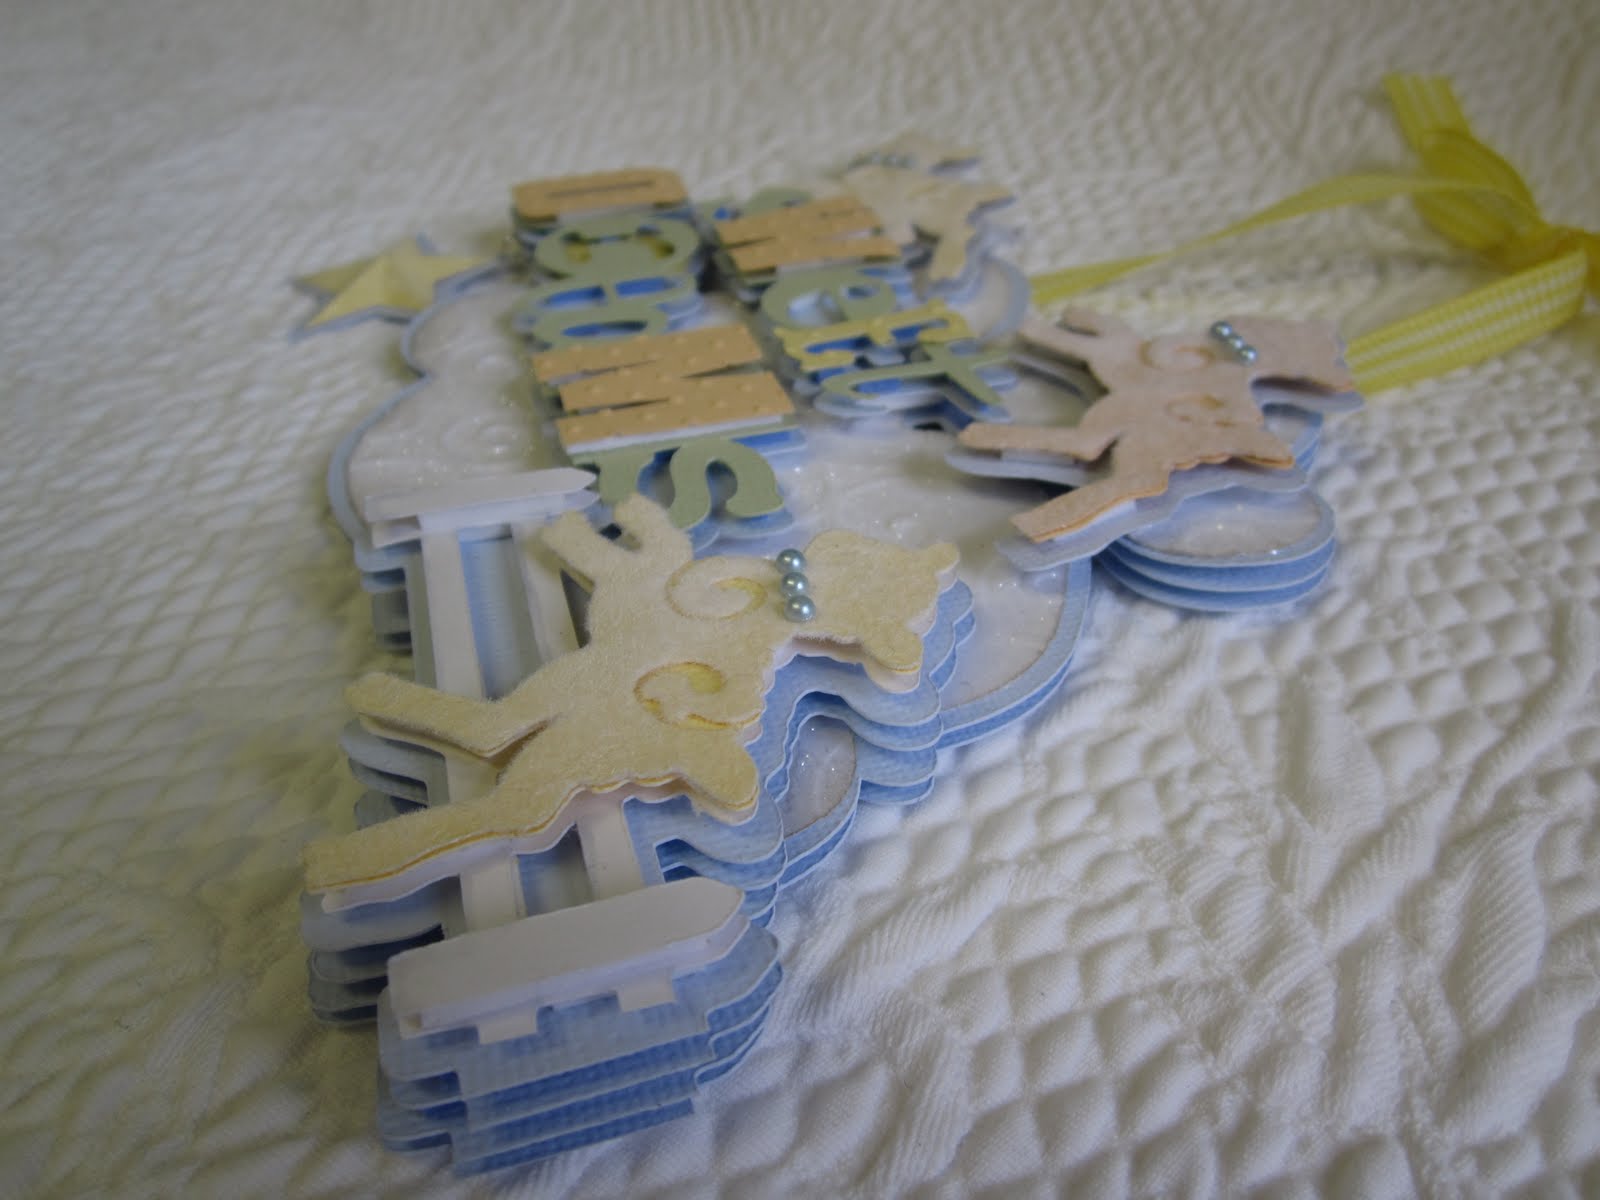
BBTB2 Challenge . Well, we're no strangers to clouds out here in (sunny? I wish!) CA since that's all we've been seeing lately. Who stole our weather? Shame on YOU! Sit back with a cuppa now, 'cause this is gonna be one long post. Not nearly as long as it took to make the darn thing but... Anyway, I immediately had an idea for this challenge but it proved to be a little more daunting than expected to design because of the fact that the clouds came in pairs (and had no shadows) so there was a lot of resizing and hiding contours to weld the base of this door hanger together. Although it's perfectly okay at BBTB2 to use another cartridge with clouds, I figured that since I own the chosen one, I was gonna go with it. I inked the clouds, ran them through the Xyron right side down, and covered them in MS coarse crystal glitter. Then I ran them through my Cuttlebug with the D'Vine Swirls folder for added texture. If you've covered your cut completely with glitter, it doesn't stick and actually helps adhesion, and any glitter that remains on your folder just rinses off. The three cloud shadows were welded in Design Studio to the shadow of the little lamb jumping over the fence (which I flipped). That cut comes from Wall Decor and More but had a much longer fence that I had to trim off by hand repeatedly for the layers. OOps! I just noticed on this top pic that the little lamby on the left has fallen down a bit. That foam doesn't like to stick to glitter. All fixed now.
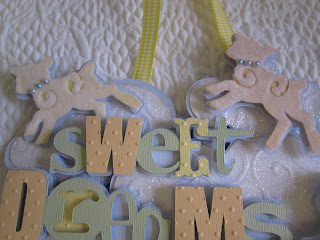
Next problem; although the sweet little lambs have individual layers, they have no shadow if you want to use them individually, so if you want one, you have to cut the border feature and then hand trim the fence off to get a shadow. I know I'm kinda anal about shadows, but the lamb didn't show very well against the clouds without one and they are very important to me for layering purposes. I cut each lamb twice, with the swirly cutout and without, in the same color and then flocked the upper layer in white which softened the colors of the card stock and made them all cute and cuddly. "Sweet Dreams" is also from Wall Decor and More and WooHoo! it has a shadow, but no individual layers for the letters, so I cut the phrase out several times in various colors and again hand trimmed and embossed with Swiss Dots to get what you see here. (There is a font on the cart, but many of the individual letters do not match up with the phrases. The "E" actually does, though)

As I assembled the hanging, I realized that I needed to balance the right lower side so I added a star from George and Basic Shapes. I poked a hole through the shadow and one of the layers of the "D" and hung it from a jump ring. The dimensional star was made by scoring from tip to indent, all the way around and mountain folding from tip to center and valley folding from indent to center. I folded first, then ran it through my Xyron and used MS fine crystal glitter so the card stock color would show through. After folding again, I attached it with one of those big globby dimensional glue dots.

As you can see, there are lots and LOTS of layers on this one and although it was a real PITA to make I totally love it and was glad I persevered. After the several days it took to complete, however, I was too exhausted to finish my Macabre Monday project, so you'll just have to check back on Wednesday for that. However, if you're craving something creepy after all this fluff, scroll down to see my offering for Skull Appreciation Day and if you're interested in hopping, it goes through Tuesday so you still have time. Be sure to stop by
BBTB2 and see the fabulous designs by my DT sisters and remember you have 2 weeks to complete the challenge and any cloud from any cart will do.


