Tuesday, August 31, 2010

Tiddly Inks Goodbye to Summer


Where has the time gone? I think I missed August completly and here it is the very last day. At Tiddly Inks we're saying Goodbye to Summer with Autumn inspired projects. I'm not sad, it's my FAVORITE time of year, when the vineyards turn golden and a there's bit of a chill in the air. I've chosen Fairy Fae Dreams. As she sits atop her Fairy House with the autumn leaves swirling about her, what is she dreaming? She and her house are colored with Copics, fussy cut and popped upon yummy paper from K&Co Alleghany Plum. For some sparkle I've added some copper leaf peelies from Stampendous and a copper border. The sentiment is a Melissa Francis rub on.
The falling leaves were a bit of a challenge. They are punched, and originally I tried colored card stock but they just didn't blend with the rest of the card. Finally I punched them in white, outlined them with a Sigma Micron pen and colored them with Copics. Much better. The twine bow added a bit of a rustic touch. Are you ready for Fall? Pop on over to Tiddly Inks Challenge Blog for the fabulous designs by the rest of the Tiddly Inkers and check out the Tiddly Inks Store for all of the new designs. And don't forget there are FREEBIES every Tues when you join the Tiddly Inks PCP group. This week it's the colored version of the Cheshire Cat (good for 48 hours, so hurry)! But BOTH versions are for sale for only a buck! WooHoo! I'm so honored that my little altered version of "What's Up" inspired Christy to add him to the store!
And hey, if you haven't already, please scroll down for the BBTB2 Blog Hop and leave a comment for a chance to win my prize.

Monday, August 30, 2010

BBTB2 Blog Hop - Apron From the From My Kitchen Cartridge


Happy Monday everyone! Didn't August just fly by? It's the last Monday of the month and you know what that means, it's Blog Hop time at BBTB2. Hopefully you've arrived from the fabulously talented Krista's Blog, if not, why not pop on back over so you don't miss a thing. It's obvious that Krista is a chip off the old block, because her wonderfully creative Mom, Penny, chose the challenge this week; the apron cut from From My Kitchen (you'll see her fabulous creation further down the road). I used my DS to make a shaped front card using a variety of cuts from the Kitchen cart. The retro papers are from Cosmo Cricket Garden Variety and DCWV Nana's Nursery.
Here's a picture of it open so you can really see the shaped front. The buttons are a combination of Making Memories Chloe's Closet and Favorite Findings (on the apron) and the gorgeous colored ones on the card base are Stampin'Up (thanks Lillie). (BTW, Lillie has 24/7 ordering now if you click HERE)
Big surprise that there's dimension, eh?, but I WAS surprised that I had the perfect little dimensional sticker from Studio 18 that I found in the $ bin at M's. (It pays to dig!) Now off to hop to see what else is cookin'. Next stop, Julia's super fantastic BLOG, but before you go, please leave a comment for a chance to win a $30 gift certificate from Custom Crops. Thanks so much, Custom Crops! The winner will be announced sometime Saturday morning (hey, come on, it's Sat. LOL).
P.S. Scroll down to see this week's Macabre Monday Challenge "Creepy Cute" sponsored by Tiddly Inks. (Even you non creepsters oughta like that!)

Sunday, August 29, 2010

macabre Monday Creepy Cute Challenge Sponsored by Tiddly Inks


Ah yes, it's another Macabre Monday at Haunted Design House with a super fun challenge sponsored by Tiddly Inks (and you know I LOVE me some Tiddly Inks!). The challenge? It's Creepy Cute. Create a dark, Gothic or Halloween page using cute images, but on the darkside. Turn something adorable into something abominable...something delightful into something devious...something cute into something creepy. Or just grab one of TI's Gothic cute images and start coloring. So here is Portence. Her lovely frame suggested a pillow for eternal rest. Her spidery coffin is cut from the Happy Hauntings Cricut cartridge. I created a shaped card using Cricut Design Studio and I hid LOTS of contours to create the background which I glittered with blood red German glass glitter. (This stuff is made from real glass so it HURTS, trust me!)
Dear Portence has been altered a tad (to look dead) by masking her eyes while printing, her x'd out peepers added by ME! (Sorry Christy, couldn't be helped) She's colored with Copics ( her skin taking a slightly greenish hue around the edges) and she's covered in a black tulle shroud.
She's still quite lovely though, hence the sentiment "Death... becomes her". Or perhaps I should have said "Undeath" Bwahaha! Again I used the Cuttlebug Embossing Plus Fanciful Label with a computer generated sentiment and a single Prima blood red rose. The coffin door is embossed with the Cuttlebug Distressed Stripes folder and the viewing window is cut with a Nesties Deckle Rectangle.
Of course there's loads of dimension and the entire card does open at the side. Ready to play along? Of course you are! Rush to Haunted Design House for more of Creepy Cute inspiration by the Macabre Minions and creep up your own cuteness for a chance to win some Tiddly Inks of your very own! (You know you want to!)

Saturday, August 28, 2010

Bah! Humbug! Charms Challenge and A Blog Award


I was determined to not wait until the last minute this week for Bah!Humbug! so I took a break from my DT stuff to create this little tag. The challenge this week is Charms and after looking through my stash I came upon this little snowflake I'd done with Shrink Plastic. It was cut on my Cricut using the Very Merry Tags cartridge. The tag itself was cut from Plantin Schoolbook on both regular and shadow at 4". The cute little Stampotique stamp is "I'm Cold" by Jill Penney. See, not all Stampotique stamps are creepy. (And can you imagine that Jill is married to Daniel Torrente of the creepy stamps? go figure) The DP's are from S.E.I.'s Wintersong pack including the paper pieced jacket. The rest of her is colored with Copics. The rub on is Melissa Frances.

A little popping, some ribbon and wired stuff that looks to me like snow balls and that's it.


Now before I get on to the blog award, I have to apologize to the 25 or so people who have given me awards since Feb. of this year and I've never posted. I truly do appreciate them, but when they started coming fast and furiously and I started to get behind the whole process got so totally overwhelming, checking back to previous posts to find what award and who they came from, etc. etc. , so I just gave up. So SOOOO sorry my friends. I will try to do better but...

However, I did receive the Cherry on Top award from Lisa, Karen, Oh Snap and Sandra (critterbugg365) and I thank you ladies sooo much. Please visit these lovely ladies by clicking on their names and leave them some love. You know the drill for these awards so I won't go over that, but I do need to post

3 things I love about myself


1. I love that I don't feel or act my age


2. I love that I've found a hobby I truly enjoy and look forward to every day


3. I love that I still believe in Santa Claus, Fairy Tales, Love at First Sight and Happily Ever After (not necessarily in that order)


And the picture I love


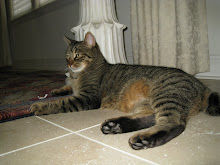
Goliath, relaxing on Daddy's lap,

not a care in the world.

Last but not least, I'm supposed to pass this award on to 5 bloggers and you know that's impossible for me to choose but I do want to recognize one sweet and talented friend who is relatively new to the blogging world (since June). I always enjoy her encouraging comments and want the rest of the crafty world to find her blog and appreciate her creativity like I do so

LISA, this one's for you!


Thursday, August 26, 2010

Bah! Humbug! Winter Wonderland (a Couple Hours Late)


Good morning! Mine started dark and early (1:45 am). It's been deathly hot and I woke up sweaty and thirsty and just couldn't go back to sleep. It must have been that I hadn't finished my Bah! Humbug! card and of course I didn't want to miss that! This past week the challenge was Winter Wonderland so I decided to play a bit again with my mini gel pens and holder from Chomas Creations. This time I chose the teal pen from the Assortment to match my frosty color scheme. The images I chose are from the Cricut Christmas Solutions cartridge. I used Design Studio for placement of both the regular and shadow features and then placed them on different mats; one for the drawing, one for the cutting. After drawing the images (pressure 3, speed 3) I pressed load mat (not load last) and replaced my pen holder with the blade housing. I adjusted my pressure to 5 and went to my second mat in Design Studio (where the shadows were) and pressed cut again. WooHoo! No fussy cutting. I did a bit of shading with my Copics using BG0000, BG000 and C1 and added some sparkle with Star Dust Stickles. I'm really loving these pens! SOOOO many applications! Be sure to stop by Amy's Blog to see more fabulous examples and you can order her fabulous products there too. Sorry about the pic here. It was still dark but the Stickles sure do stand out!

Hmmm, another card that fits a business envie. The base is Bazzill sparkle and the background is embossed with the Snowflakes limited edition Cuttlebug folder from Custom Crops. The top mat is embossed with a OMC Internet Exclusive Sizzix snowflake folder. The cut out is a Nesties Mega Classic Scalloped Oval. Big surprise that I used the Cuttlebug Embossing Plus Fanciful Labels which I colored with the same gel pen and added a peelie and pearls. This dimension shot is a bit better as to color. I'm also entering this in the Winter Wonderland Challenge (another great Christmas challenge blog) whose theme just happens to be Winter Wonderland. Anyway, hope you like. It's gonna be another scorcher so this Winter Wonderland is looking pretty nice right now.
I'm sorry for those of you who have asked, but I didn't save a .cut file for this. I just used Design Studio for placement of the shadows (for the cut page) and each of the images was cut individuallyafter drawing them all first. I have a tutorial on using Cricut Markers HERE that explains what I did I guess in more detail. Cricut markers work the same way as these pens. The example showing the monkey in that tut is what was done for this card. Hope that helps.

Wednesday, August 25, 2010

The Cuttlebug Spot Oh BABY!


This week at The Cuttlebug Spot it's all about babies. I LOVE babies and making baby cards. You can use all that frilly stuff and yummy colors! I wish they made scratch and sniff "baby smell" to put in them too. Is anything sweeter? I just want to eat them up! Okay, back on track. I usually try to keep these challenges all Cuttlebug if I can, but I had these adorable little clothespins that were just CALLING to me and also wanted to break out my new Cuttlebug Embossing Plus Monogram Seals for the sentiment. The baby clothes are from the New Arrival cartridge using papers from both Nana's Nursery mat stacks. I enhanced the embossed letters just a bit with my Copics (you do have to be a bit careful here so they don't bleed). The clouds are from Dreams Come True, cuttled with D'Vine Swirls and what would a baby card (or any card for that matter) be without Swiss Dots? LOL
This card fits a legal size envie (I hope!) There's a bit of popping of the clothes and with the natural clothespins and line, I added a kraft mat to tie it all in. The border punch is an old MS double scallop. As usual, there is loads of inspiration from my DT sisters so pop by The Cuttlebug Spot to check it out. And I've already seen some fabulous entries for the challenge to win a $20 gift certificate to Custom Crops. Where's yours?

Tuesday, August 24, 2010

Back to School with Tiddly Inks


This is my second post of the day, so if you're looking for BBTB2 (a day late) please scroll down.


The Tiddly Inkers are going Back to School this week with fun new projects and some fabby new images from Christy. I had a hard time choosing but SchoolGirl's gorgeous wavy hair won out. My original plan was to just make a card but I was talking to my dear friend Lillie and she had made the sweetest little backpack for her Cricut Cuts and Stamps challenge that I fell in love. Hers was a Cricut .cut file and I was way too lazy to design my own so I sort of put the idea aside until I was on my sweet friend Smita's blog (be sure to vote for her team!) and she had done an adorable backpack as well with a LINK to a tutorial which turned out to be from ANOTHER dear friend DeeDee from way back in 2008 before I even WAS blogging. Thank you to EVERYONE! Okay, so sorry for the long round about story of how this came to be, but isn't it fabulous to have bloggie friends for inspiration and how we all are connected!?


I had already picked out the cute apple paper by Creative Imaginations so my color scheme was set. I colored SchoolGirl to match with my copic and followed DeeDee's tutorial to make my backpack. The cute apple cut is the shadow cut from Create a Critter and I cut a circle out if it with Cricut Design Studio to frame SchoolGirl. My BFF's daughter Hayley is starting high school TODAY so I spelled her name out in Alpha Beads.


Had to have a little card to go with so there you go. It's a simple A2 (which I hardly ever do) but anything bigger looked silly with the little backpack and I wanted SchoolGirl to take center stage. She's cut and matted with Nesties with a matching bow and apple button and LOADS more Alpha Beads. Now pop over to the Tiddly Inks Challenge Blog to check out the adorable projects from the rest of the Tiddly Inkers and while you're at it, why not do a little back to school shopping at the Tiddly Inks Shop? I'm also going to enter this in Lillie's challenge too because it has both a (digital) stamp and a Cricut cut and is certainly a back to school theme (if she doesn't mind that I copied LOL). So now you've got TWO great challenges to play along with. (And there are prizes to be had!) Hope to see you there.

BBTB2 Flamingo Challenge


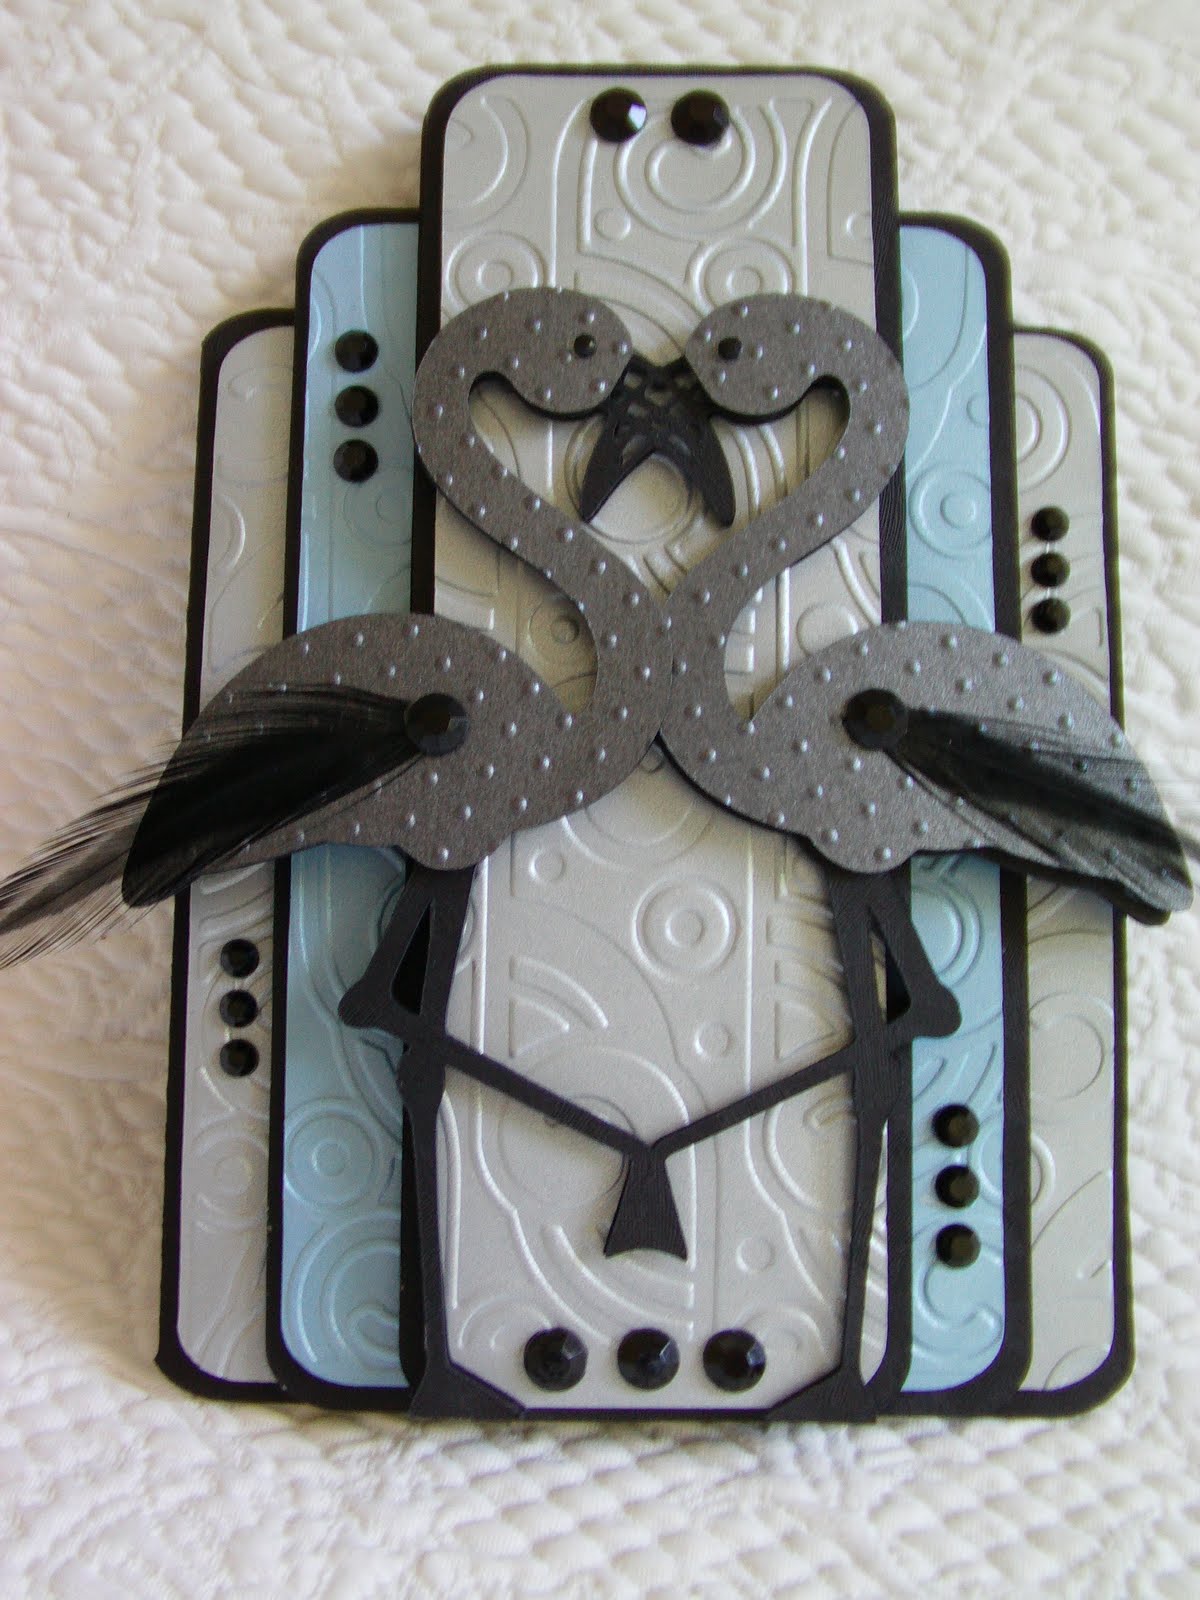
Sorry for the late post here I've been sort of out of whack. DH went on a WEEK long backpacking trip and my schedule sort of went to hell. He's back safe and sound (and sunburned to a crisp and exhausted) but he's a happy camper and so am I. This week at BBTB2 our dear DT sister Melissa chose the flamingo from the Life's a Beach cartridge and added a twist. Our flamingos should be either patterned or any color OTHER than pink. I was messing around in Design Studio and decided that with no shadow and such delicate legs a shaped card was not in my future. (Well okay, this is sort of a shaped card, but you know what I mean.) When I flipped a second image and welded them together however, they started to look rather Art Deco to me so that's where I went. (I kept thinking Miami) I was dying to use one of my new Art Deco Cuttlebug Folders and set out to make something that looked a bit architectural and welded some rounded rectangles from George to make the base. Then I started layering, and layering, and LAYERING!

The card is about 3/4 of an inch thick and weighs a TON! Can't imagine what occasion it could possibly be for (although the flamingo heads sort of form a heart and our anniversary is coming up...no, not what I'm going for) and since it would probaby cost at least $5.00 to mail it ain't goin' anywhere soon. LOL The irridescent papers are from WalMart and M's and I couldn't resist some bling (also from M's). The rest of the team really rocked this challenge so check them out HERE.

Sunday, August 22, 2010

Macabre Monday Pink on the Brink!


It's challenge 53 for Macabre Monday at Haunted Design House. What's the challenge? Pink on the Brink, sponsored by none other than the FABULOUS Tickled Pink Stamps! Do you dare creep up the quintessential girly girl color? Well here is Tickled Pink Stamps dear Lil Lolita Lilith, pining away for a long lost Love. Does true love ever die? I think not. I think it lives forever in your heart, don't you? This shaped card was done in Cricut Design Studio (they don't call me the Creepy Cricut Cween for nothing) using the skull and crossbones on Life's a Beach. The fabby DP is from the DCWV Madly in Love stack. Lilith is colored with Copics and the headstone is a Cuttlebug cut and emboss duo.

The sentiment is from the Cuttlebug Love Language Card Making combo. It's cut with adhesive Fun Foam for dimension. Trust me, it cuts like butter, woohoo! I did a little messing with the layers (that actually didn't exist) so I could pop them up and don't hate me because I added a bow. It just couldn't be helped. Now go have a look see at the rest of the Minions creations and see what you can do for a chance to WIN a Tickled Pink stamp of your own.

Saturday, August 21, 2010

It's a Cricut Card, REALLY!


So of course you all know I've been enjoying a bit of a diversion with stamping and the like but look again here. This is a Cricut card. At CHA I spent alot of time with fellow Custom Crops Design Team sister Amy Chomas of Chomas Creations. Amy makes those fabulous mini gel pen, mini sharpie, and micro mini sharpie holders that work in the Cricut like the Cricut markers but SO MUCH BETTER! (Over a martini or two, hee hee) we got to talking about Copics and she said "Well you know you can use my pens with Copics too." What? Are you kidding me? Sure enough. (Okay, so I'm a little surprised I remember the conversation...)

Although I LOVE the images on the Tinker Bell and Friends cartridge, the chances of me cutting those teeny little pieces are slim to none. Instead, using Design Studio, I placed both the shadow and regular cuts of Fawn and that gorgeous floral corner on my screen for placement. Then I copy and pasted the shadow images to another screen and welded them and went back to the original screen and deleted them. Now I have one mat for drawing and one mat for cutting. I replaced my blade with the mini gel pen holder and first drew the images. (I used pressure 3, speed 3 but in DS the speed has a mind of it's own) NOW, DO NOT UNLOAD THE MAT, PRESS LOAD MAT (not load last) and replace the pen holder with your blade again. (ADJUST YOUR PRESSURE to cut, VERY IMPORTANT) Go to your second page (with the shadows for cutting) click cut and voila! Now you don't have to use DS for this if you're just cutting single images and it works the same way. If this is clear as mud, check out Amy's video HERE.

WOW! Now I could color to my heart's content and didn't have to fussy cut around the image to pop it! I have the freedom to resize like a digi, WOOHOO!!! I don't know about you, but those Disney carts drive me up the wall and I can see getting SO much more use out of them with my pen holder! Not all that much more needed for the card either. The gorgeous paper is K&Co Que Sera Sera, a bit of that sort of weird sparkly fuzzy $1 bin ribbon from M's and "imagine" in wire attached with my Tim Holtz Tiny Attacher. Guess you still can't really see it, but it's there and looks pretty cool in person.
Not a whole lot of dimension here, but this was a first attempt. It will be interesting to try drawing and cutting the layers for even more dimension. Thanks Amy for cluing me in to this fabulous application for your mini holders. I'm SURE to be using them a whole lot more now, not to mention all of those nearly unused Cricut carts I thought I just HAD to have. Be sure to check out Chomas Creations for more great ways to use these FABULOUS holders (including the embossing kit which I'm anxious to try after seeing Amy's super cool layouts). They can be purchased right on her blog (as well as Custom Crops) and I have to mention that they are manufactured in the USA which is always a big deal to me (especially in this economy) by Amy and her family members. (Tell me that's not cool and deserves support!) Luv ya, girl!
I'm also linking this up to Scraptastic Saturday which is a great new feature on Hannah's blog where you can view a wide variety of fun creations all in one place.

Thursday, August 19, 2010

The Cuttlebug Spot - Sympathy Cards


This week at The Cuttlebug Spot we were asked to do Sympathy Cards (or apparantly also Thinking of You cards, you lucky participants, because I had a hard time here.) With all of the cards I make, I just don't do sympathy. I can't, and I feel terrible about it too because I've had the occasion recently and just froze up. Had I made this one I probably wouldn't have sent it anyway because it's pretty darn foofy (suitable for the Pope? Ha Ha, Margie!) but I was determined to use a bunch of stuff I bought awhile ago and had yet to even open. Those things include the Spellbinders Cross set, the Lattice Pendant and Lattice Border and one of the 5x7 embossing folders from the Cricut Companion Sentimentals Cuttlebug set. The lacy corners come with the pendant, the rectangular panel behind the layered cross is the cut out center of the Lace Door Embossing Plus folder and of course the computer generated sentiment is on yet ANOTHER of the Fanciful Labels (that one's getting a workout!)

I layered up a storm and actually do think it turned out quite pretty. Maybe I'll just change the sentiment (First Holy Communion, Christening?). Be sure to stop by The Cuttlebug Spot for a glimpse of the more tastefully simple and elegant cards done by my DT sisters. And if you're not inclined to do Sympathy, you can still play along with a Thinking of You card as long as it's embossed and is NEW (come on you guys, back posting isn't fair to those who really take the challenge!) and you may win a $20.00 gift certificate from Custom Crops.

Wednesday, August 18, 2010

Bah! Humbug! Challenge 31- Angels and Fairies


Oh boy, just under the wire again for Bah! Humbug! this week with Angels and Fairies. I couldn't resist using another adorable Tiddly Inks image called Holly Bugg. She's colored with Copics and mounted within an ornament cut with my Cricut from Joys of the Season. The top mat is embossed with a 5x7 Cuttlebug Holiday folder exclusive to Oh My Crafts. The green mat with the circle cut out was also done with my Cricut using Design Studio and it's embossed with Swiss Dots. I did this by cutting my folder at the fold, and placing it in the center of the mat, using the open circle to "click" it in place before running it through the Cuttlebug. Gutsy, eh? LOL
Then it was just a matter of popping the red mat, adding a peelie border and holly sprig and some ribbon, adhesive beads and metal sentiment from M's.