Monday, May 2, 2011

BBTB2 Preserves Apple Core Challenge


It's Monday AGAIN! How time flies! Our BBTB2 challenge this week was chosen by our fabulously talented and pretty darn sweet, fearless leader, Heather. Her pick is the apple core from Preserves. WOW, ANOTHER cart I don't have (sure seems like I've got them all) and to be honest, I almost blew this one off coming off a birthday trip and all and I was a little off my game, but just 'cause it's YOU, Heather... Anyway, I used CricutSearch.com to pull up apples and lo and behold there was somewhat of a core on Give a Hoot. It was part of the border feature and didn't have any layering but I decided to see what I could do in DS. First I made a shaped card using the shadow of the apple from then on, who knows. I stretched and skewed and hid contours up the ying yang to get a size that fit correctly on my base and layered images until I managed cut a core and some peel. The center part is from George and the seeds were the result of some additional manipulation of one of the cuts from Give a Hoot. The adorable worm is from Create a Critter and the sentiment is from the Cuttlebug Everyday Greetings Card Making combo.

Sorry there's not as much layering as usual. I actually had an additional apple layer under the worm originally but when I decided I didn't like the first base color I chose and cut the whole thing over, I decided that layer didn't add to the design and I chucked it. Not quite as much detail, either, but DH was itching to go to the wine festival in town so... Now go be inspired by the rest of the DT's fabulous creations HERE and remember, we allow some artistic license if you haven't the cart in question. Oh, and if you're having a rough Monday, scroll down for a laugh.

Sunday, May 1, 2011

Macabre Monday WTF, I Mean Freakers Free For All Challenge


This week at Haunted Design House we were tired, VERY tired, so we pretty much said "WTF" which translates as a fabulously EASY challenge for all. We're having a Freakers Free For All! Woo Hoo! Show us what ya got. Twisted, creepy, even creepy cute,we wanna see it. I have been DYING to make this card and what a perfect occasion. The image is from the Femdom digi stamps set from Smeared Ink. The fab chain punch is by EK Success and the background is embossed with the Sizzix Tim Holtz Bricked folder (makes the perfect dungeon). The sentiment is computer generated. Anybody feel that way this lovely Monday morning? Yeah, I thought so.


And some words of encouragement inside. Boy, do we have some inspiration this week! Just scary what's been on the Minion's minds! You must have a look HERE and be sure to play along. (Hopefully I'm not too early, I told you it was a sort of WTF kind of challenge). LOL But it's no holds barred! I'm also entering this in the ABC Challenge T is for Trouble. Yeah, I think it qualifies. LOL


AND in celebration of our 400 fabulously twisted followers, the Masterful Mistress is offering up some sickly sweet candy up for the taking. Don't miss out! Check it out HERE! Halloween came early this year!

Friday, April 29, 2011

Tiddly Inks Treasure Hunt Blog Hop


Welcome to the Tiddly Inks Treasure hunt Blog Hop! We're kicking off Tiddly Inks First Birthday Celebration with lots of fun and inspiration. If you've come from our special guest Debra's Blog, you're on the right track. If you've happened upon this post accidentally you might wish to start HERE so you don't miss out on the chance for the fabulous BOOTY (No, not that kind, I WISH! I mean PRIZES) scattered throughout the hop. Christy has been a busy gal with a new release of tons of adorable stamps. You can find them all in the shop HERE. And EVERYTHING will be available at 25% off May 1-3. WooHoo! My first card features Bev and June. Aren't they they sweetest? Obviously they are best friends so I designed a clean and simple card celebrating friendship. They just begged to be paper pieced, don'tcha think?


Next is Come in Cuteness. I totally fell in love with this adorable little guy! He's colored with Copics and the fab DP is from K&Co Daydreams. The sentiment is computer generated. Male cards just got a whole lot easier. WooHoo! Hope you're inspired to see what else the Tiddly Inkers and Special Guests have in store. Also, if at any time you get lost, visit the TI Blog HERE, but be sure to follow in order so as not to miss the treasure clues. Now...

(That would be Jess, in case I screwed up the link. Still recovering from MY birthday! LOL)

Thursday, April 28, 2011

Tiddly Inks April Showers Bring May Flowers


This week our Tiddly Inks challenge is April Showers Bring May Flowers. Not my team's turn, but I loved the challenge so much I followed it too and I'm really excited about how it turned out. I used the sweet Donna image (notice the resemblance, LOL? Actually she was not named after me but...). Anyway, I flipped the image, colored her with Copics, cut and backed her with Nesties Classic Ovals, and her boots and slicker are shined up with Glossy Accents. The sparkly rain drops are stickers by Recollections and the sentiment is computer generated.


The cool thing is that it's an acetate front card so you can see a part of the inside from the font when it's closed. The colored image, sentiment and rain drops are on the front of the card, and the red and yellow mats are attached from the inside so the adhesive doesn't show. Conveniently, the stickers have a holographic sparkle on the inside as well.


Inside I've used Flower Garden, again colored with Copics. This adorable stamp (with colored digi papers too) comes from a drawing done by Christy's daughter. Obviously the apple didn't fall far from the tree. Isn't it sweet? So come on and play along with the current challenge HERE and don't forget the Treasure Hunt Blog Hop Saturday with loads of fun, inspiration, new images and a hunt for "booty". HHHmmm... got WAY too much of that already. LOL Check the deets HERE. See you Sat!

Wednesday, April 27, 2011

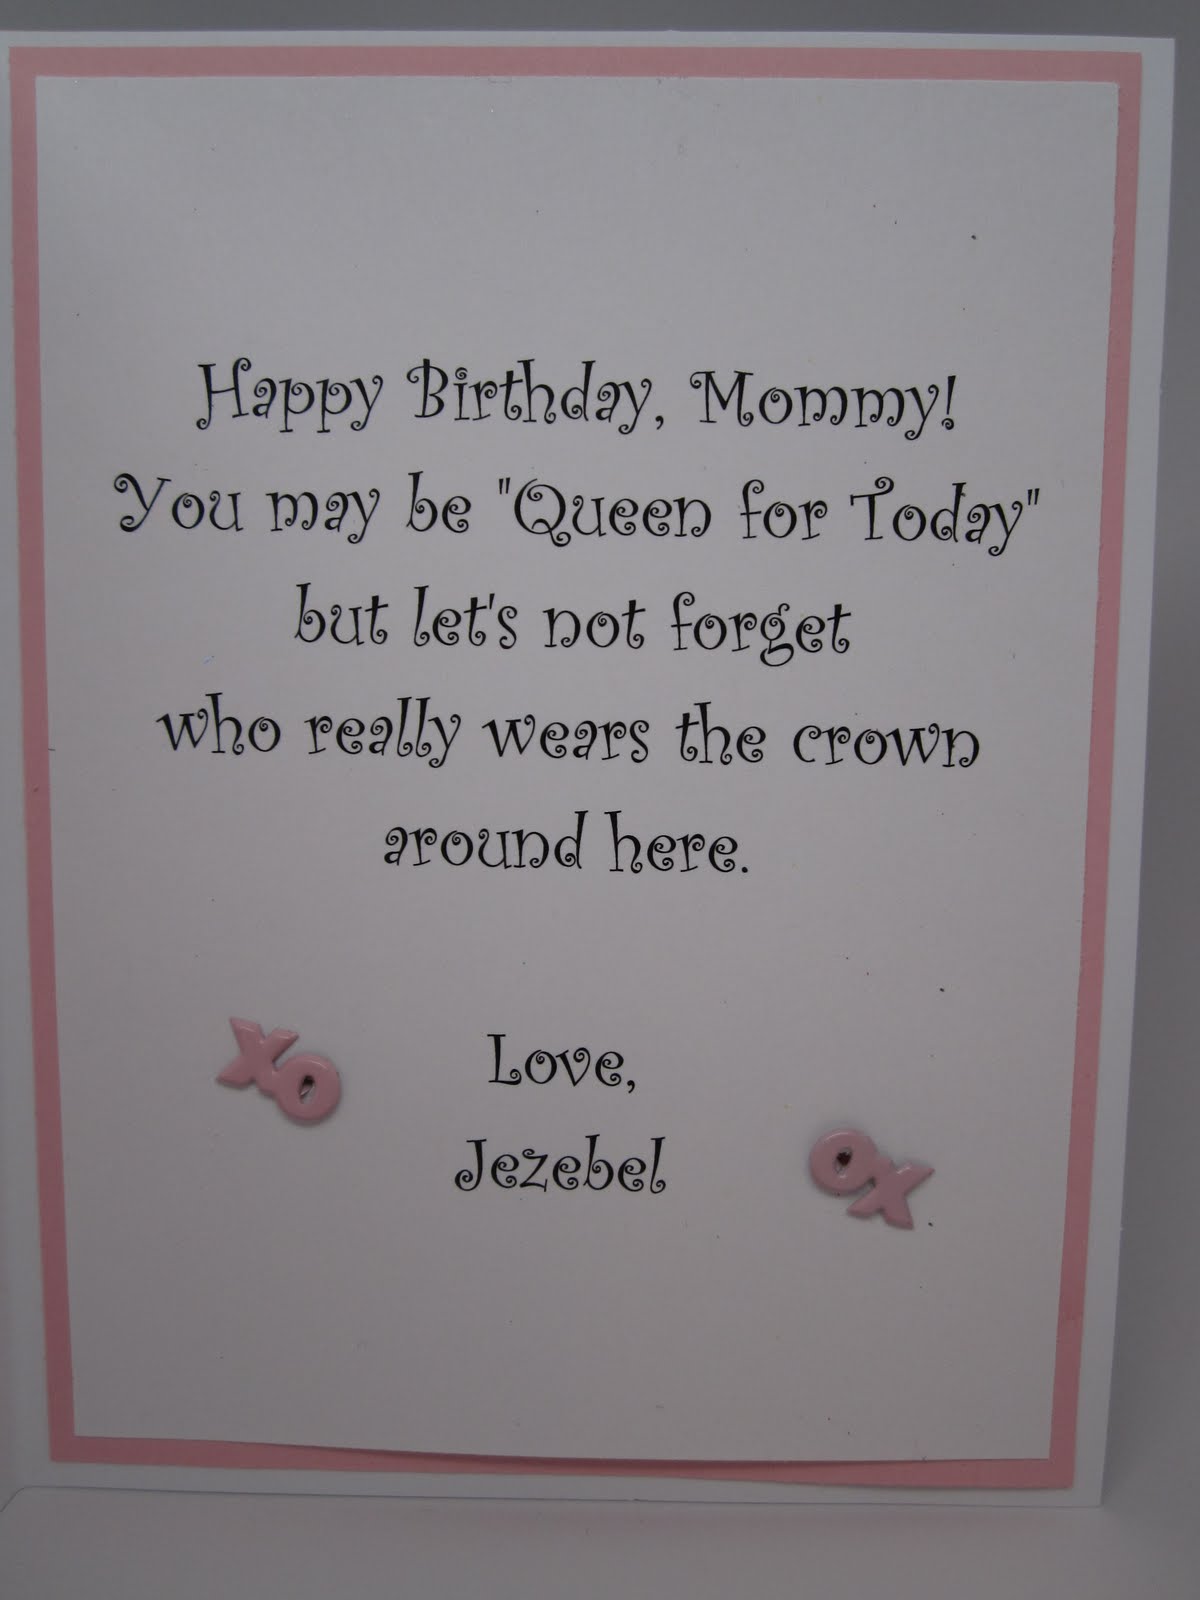
Jezzie's Birthday Card to Mommy


So Jezzie came in all frantic. "Mommy, I need a birthday card, RIGHT NOW!" "Okay, for who?" "Well, for YOU, Mommy, who else?" "Ummm, doesn't Daddy usually take care of that for you and Goliath?" "Well yes, Mommy, but last year he bought a card that had DOGS on it. He thought they were cats but they were really DOGS!!!!" "Good point." "Now Mommy, I will tell you just what I want. It must have pink and remember, I must be white, sparkly AND fluffy and have a crown and a scepter and..." (Not too demanding, is she?) "Okay Jezzie, but aren't birthday cards supposed to be a surprise?" "Oh it can still be a surprise, Mommy. Just keep your eyes closed while you make it." I'm afraid it sort of looks like that was the case, but she was very happy. The stamp is one of the Party Hats Cats by Lost Coast Designs and I used my glue pen to add Sparkle and Fluff. The beautiful frame is the Decorative Oval Window Die from Heartfelt Creations. I have no idea where the Crown, Princess, and Wand came from. They were a set.


Her message cracked me right up. Obviously she was a bit miffed with my "Queen of Everything" hanging. LOL So off we go for a couple more days at Post Ranch Inn in Big Sur. (See pix of last trip HERE) Thank God the road (that fell into the ocean after the rains) was reopened so we don't have to drive all the way down to Paso Robles and back up making what is normally a 2 1/2 hour drive more like 6. However, now Highway One from the South is closed now due to a landslide. YIKES! We're falling apart here in CA.

Tuesday, April 26, 2011

Bah! Humbug! Santa Claus Challenge


This week at Bah! Humbug! the challenge is Santa Claus. I have a number of Santa collage Stamps from Tim Holtz that I've NEVER inked up so I though now might be a good time. I also bopped over to some of the other Christmas challenge blogs to see if I could combine a challenge or two and saw the cool "HOT Spot" technique on the ABC Christmas Challenge Blog. I'll admit, my stamp isn't the best one to showcase this cool technique but I did follow the tut and colored only the cut out circle of my stamp. The fact that it is a collage stamp and I did a bit of distressing sort of dilutes the effect but I will definitely be trying this again and I encourage you click HERE to see proper examples.

This was definitely a quickie because I'm scrambling to get my DT things done and scheduled before my little birthday trip back to Post Ranch tomorrow, and OF COURSE I couldn't miss my fave Bah! Humbug! challenge being a proud Loyalty Member and all. The red mat was a piece of cardstock that had been laying on my desk for who knows how long. I'd obviously used it for cutting something with my Nestie labels but I liked the edge so I threw it on. Then just a couple of mats, some ribbon, and the popped "hot spot" and there ya go. I've actually posted this early enough that those of you who are interested still have time to join in at B!H! so I hope to see you there but only 8 hours left for ABC. Glad I could sneak it in.

Monday, April 25, 2011

BBTB2 Home Decor Crown Challenge


Good Monday morning! Is everyone recovering from their chocolate hangover? Yeah, me too. This week the fabulously talented and dear friend, Julie, has chosen either crown from Home Decor for our BBTB2 challenge. I started out trying to make a shaped front card, but the cuts I wanted to use weren't cooperating. It would have had to have been long and skinny, and the fold for the base would have been at an inconvenient place so I scrapped that idea, expanded the cuts, and made a wall or door hanger. The base from Picturesque, which I skewed in Design Studio measures 11 1/2 x 8 1/4 so it's fairly large. I apologize for the dark colors, not very Spring-like, eh? but this is for ME (just in case anyone forgets who's BOSS around here) and I'm not a pink kinda gal. The DP is from GCD Studio's Paris Nights collection.


Once I'd chosen and cut the base, the crown posed sort of a problem. I'd hidden the contours of the crown shadow but wanted to fill in that space on the regular cut. I couldn't find another print with the right scale so I cut the blackout in cream card stock and embossed it with the Cuttlebug Textile Texture folder and inked it lightly with Black Soot Distress Ink. It still didn't look right to me. I finally covered the embossing with a single layer of black tulle which muted it ever so slightly and mimicked the print on the DP and I was good to go. Added a little feather there to balance the red "Queen" and of course, adhesive gems.


"Queen of Everything" comes from Graphically Speaking (LOVE that cart!) It's a little hard to read in the first pic, but it's okay IRL. Of course I cut it several times and popped it for dimension, but the one thing I DON'T like about Graphically Speaking is the lack of layers in some cases and no shadow cuts...Grrrr. To get "QUEEN" in red, I postioned the sentiment partially off the page so as not to waste so much paper and then hand trimmed at the base of the letters and popped them slightly offset. Problem solved! Looking at it now, though, I should have cut the whole thing and used the rest under the black"of Everything" to help bring out that part of the sentiment. Oh well, hindsite is always 20/20. The pretty tassel is from J's, I think, and the button it's hanging from is Recollections for M's. It was silver so I colored it with my gold leafing pen. Be sure to bop by BBTB2 and see the gorgeous inspiration from the rest of my teamies and remember that if your don't have Home Decor, any crown will do. Also, if you're so inclined, please check out my Dimensional Challenge on Yvonne's Blog, Do More With Less. I'd sure love to see you play along with BOTH challenges.

Macabre Monday Alone in the Dark Challenge


This week at Haunted Design House our challenge is sponsored by our very own Temptress of Terror, Teri of Delicious Doodles. Our mission was to create a card with a black or eerily dark background. Teri has so many fabulous dark and sinister images (she has beautiful and cute ones too, but...) that I had a very hard time choosing, but finally decided to make an easel card using the Grim Reaper.


The card base and computer generated sentiment were cut with my Nesties Mega Curved Rectangles. The fab DP is from Basic Grey.


I printed him 4 times and cut the images so I could decoupage the layers, used a tombstone I cut and embossed with my Cuttlebug, and a moon from my Cricut October 31st cartridge. It's particularly fun to decoupage her sketchy images because they often need no coloring at all. WooHoo! I have to tell you a funny story about this card and you tell me if you can relate. I'll admit I make a ton of cards and often show them to DH so he doesn't pay a whole lot of attention but... In this case I wasn't sure of a sentiment so I brought it down almost completely finished to ask his advice. He glanced up and said, "Oh that's nice, is it an Easter card?" ARE YOU KIDDING ME?????? Take another look! He laughed and suggested a sentiment that I'd love to tell you, but I'd hate to offend. Anyway, the Minions have outdone themselves this week and with the fab prize from Delicious Doodles I'm sure you'll want to play along, so hop on over To Haunted Design House and be inspired. I'm also entering this in the Delicious Doodles Challenge for this week which is Anything Goes. WooHoo! You should really check this out, because Teri has a wide variety of images and a fab Design Team.

Sunday, April 24, 2011

Happy Easter!


Happy Easter Everyone!

I really thought I was done with Easter cards but this frame was still laying on my messy desk just begging to be used and I realized I hadn't colored a single one of my quirky Easter and Spring images from The Octopode Factory. Well that would NEVER do! I know you love 'em. So here ya go, an Easter card that I hope makes you smile. I love it when you smile... The egg frame was cut on my Cricut from the Easter 2010 cartridge. The DP is from Heidi Grace. Sentiment is computer generated.


Here's the dimension shot...and speaking of...I sure hope you have a chance to play along with my challenge on Yvonne's blog, Do More With Less. Am I gonna have to hunt you guys down? Throw on a few pop dots and you'll be good to go. I'm feeling very sad and neglected. BooHoo! Don'tcha wanna make ME smile again?? Pretty please?

Friday, April 22, 2011

Hoppy Easter


Although I didn't use Celebrate with a Flourish for my BBTB2 project this week, I did check out alot of the beautiful cuts and couldn't resist doing an Easter card using the sweet bunny and Easter sentiment. I started with an egg shaped card welded in Design Studio using Easter 2010. Then I just cut the layers. Added a bit of texture to the grass layer with Swiss Dots and cut that layer an additional time so I could pop the flowers. I'm thinkin' the Swiss Dots and the striped Egg will qualify for Papertake Weekly's Challenge which is Spots and Stripes. I glittered the bunny but running him through my Xyron face down to match the glittered striped in the DP on the egg. I'm hoping that's enough sparkle to enter this into the ABC Challenge "S" is for Sparkle. You know, some people complain that the adhesive from the Xyron either leaves sort of excess adhesive over the small cut out or leaves gaps on the die cut which isn't that big a deal for just gluing, but if you're glittering or flocking it's a prob. This won't happen if you use a stylis to trace around all of the cut edges (especially the small openings in letters and such) and then really rub the clear side to make sure it comes in contact with the adhesive to help pull it cleanly away and also helps the adhesive adhere firmly to the die cut. It takes a few more minutes, but really makes a difference.


You know I love the layers, and even more if they're popped, so of course, that's what I did. I'm not sure this is what the gals at Cupcake Craft Challenges had in mind but they gave us a pretty wide berth so I'm entering this in their Lots of Layers challenge as well. And speaking of POPPED layers, I'd sure love it if you'd visit Do More With Less and check out my Guest Designer tut and come join my challenge. Yvonne's Blog is packed with super inspiration and I'm giving away a great prize.


The inside sentiment is also from Celebrate with a Flourish. I added a few adhesive pearls to enhance it. Some were colored with my Copics to match. Obviously this is an Easter card so I'm entering it in the Sparkles Forum Challenge which is Easter and also the Whimsical Wednesdays April Showers Bring May Flowers Challenge. See the flowers, Steph? I'll try to do better next time, but I didn't want to miss it. LOL

Wednesday, April 20, 2011

Bah! Humbug! Christmas Stocking Challenge


This week the Humbuggers are calling for Christmas stockings. I decided to pull out my Christmas Lace cartridge for only the second time. I was so excited about this cart until I saw that the backing for the lace designs weren't shadows, but only a backing for the cut outs, and in some cases I found it difficult to even tell what some of the images were. That's sort of how I felt about the Christmas stocking. Awfully skinny, if you ask me, so I grabbed Christmas Cheer and played around in Design Studio to skew one of the stockings enough to be sort of a shadow and cut the scrolly part out of the center. I then skewed the shadow of that stocking for a backing. It was so large, that unless I wanted to make a 6x9" card I needed to think of something else so I decided to use it as an over sized tag. Large presents look sort of ridiculous with teeny tiny tags, so there you go.


I glued the embossed solid tag to the shadow, cut teeny red foam pieces to pop the lacy bit and added adhesive beads to embellish. The hanging tag is cut from George and "For You", computer generated. I think it turned out pretty elegant, don't you? Be sure to stop by B!H! to see the fab inspiration and read the post for this challenge. It's a hoot! Max is BACK! HeeHee! I also found a fairly new Christmas challenge blog which runs their challenges monthly (for all you guys that can't handle Christmas once a week (LOL). The April challenge for the Sparkles Forum Christmas Challenge is Ribbons and Gems so I'm entering my tag there as well. go check them out.

Guest Designer Spot, a Mini Tut, and a CHALLENGE


I'm so excited to be Guest Designer On Yvonne's Blog, Do More With Less. I'm in love with Yvonne's bright and happy style, her unique work with misting, and fabulous layouts. You MUST visit her blog for a look see. Yvonne mentioned she enjoyed my dimensional cards and wanted to see how they were created so I photographed the steps for my most recent BBTB2 design. I'd love to have you visit, comment, and participate in my challenge with a new dimensional creation of your own. (No, it doesn't have to be as fat as mine. LOL) This is the first challenge I've ever done and of course there's a prize (a good one from Custom Crops!), so please take a look HERE. (BTW, Custom Crops is having a FABULOUS Cricut sale. Don't miss it!) xxD