Friday, April 1, 2011

Pretty Kitty from Peggy Loves Vintage


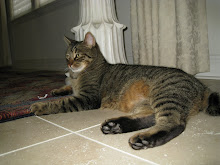
Peggy Loves Vintage has released a whole bunch of darling new Cut Outs and I just couldn't wait to play. So many adorable Easter Cut Outs, and children and animals and especially KITTIES!!!! You know how I love KITTIES! But which kitty first? Well, this one looked so much like my Jezebel that I couldn't resist! She's from the Cuties Animals 2. And sitting in that bunch of flowers she looks like she's perched in a window box. Seriously ADORABLE AND I got a chance to use my new Decorative Window Scene Die made by Spellbinders for Heartfelt Creations. I fussy cut the kitty, cut and embossed the frame and decided the beautiful bright colors would just pop against an all white card. The background is embossed with my new Sizzix Ornate Frame #2 from the newest Ornate Frames set and I saved the pieces from the Window frame cut out and embossed those with Swiss Dots. The tag was cut with my Cuttlebug Embossed Tags folder and the sentiment is a peelie.

Besides the variety of texture, I think popping the elements for an all white card gives added interest so I popped not only the kitty, but the tag, frame, and entire first mat as well. I LOVE this card and Jezzie thinks she's quite the star. (I didn't have the heart to tell here it isn't REALLY her.) You can see the entire collection of new Cut Outs on the Peggy Loves Vintage Blog and they're available for purchase at her Web Shop, Etsy Store, and on Ebay. Peggy is also sponsoring the challenge at Craft Us Crazy so be sure to check it out for a chance to win free images.

Wednesday, March 30, 2011

Happy Birthday, Margie and Bah! Humbug! Christmas Tree Challenge


Before I do anything, I want to wish my dear friend Margie (Bellabug) a very HAPPY BIRTHDAY! I'm thinkin she'll be asleep before I post this so she won't see it until tomorrow (March 31) which is the BIG DAY! Have the best birthday ever and win, win, WIN BIG at the casino WOOHOO!!!, don't get too tipsy, and stay away from pay per view. LOL Love you, girlfriend! Be sure to wish her a happy day.


Okay, so this week at Bah! Humbug! the challenge is Christmas trees. I wanted to do something different so I decided to do a 3D project. I'd been playing with the Stampin' Up Petal Cone die (thanks Lillie) and turned it upside down. It sort of reminded me of a tree and wondered if I stacked them how it would look. I embossed the cones with the Stampin' Up Elegant Lines folder and cut the scalloped portions of the die in red. I think the clean red and white looks kind of Scandanavian to me. (I'm half Swedish).


To stack the cones I cut circles with my Nesties that would fit inside the cones. This one for the top cone,


and this for the bottom. The base is a ribbon spool that has been covered in card stock, also with my Nesties and the trunk is just a rolled piece of regular copy paper. For a first try I don't think it turned out half bad. I think I'll be playing with this again.

Tuesday, March 29, 2011

The Cuttlebug Spot Oh So Soft Challenge


Were rounding up our month of embellie challenges at The Cuttlebug Spot. And I'm sad to say it's the last of our challenges for awhile. The Cuttlebug Spot will be taking a bit of a break but don't forget us, WE'LL BE BACK! Our final challenge is Oh so Soft featuring felt in our designs. I was particularly excited about this one because I'd been dying to try my MFT Die-namics dies with felt. I use the Rolled Flower and the Rolled Rose. They cut quite easily in the Cuttlebug, but in a few cases I did have to snip through a few reluctant stands of fiber. You use the same sandwich as with Nesties; A plate, C plate, die, felt, and B Plate. Then I rolled them up and glued them using Zip Dry glue to a small punched circle and added adhesive pearls to the centers. The leaves were from the Spellbinders Nested Leaves dies. Pretty pretty, huh? The background embossing is done with an old style Fiskars Basketweave Texture plate. I'd never had much luck with embossing with these, but while at the Scrap Expo I came across Lucy McGoo's Wonder Goo which, when sprayed on card stock is (among other things) supposed to enhance embossing. Still not as crisp as a folder, but a definite improvement. The eggs were cut with my Spellbinder's Nested Eggs dies, and embossed with my new Sizzix Country Foliage folder. The bottom scalloped border was not punched, but rather cut with the Scalloped Scallop Die-namics Die from MFT. "Happy Ester was computer generated on a little banner cut with my Stampin' Up Bigz Petal Cone Die (Thanks Lilllie!) I'll be using that whole die in the near future.


So, it's a simple Easter card, but ALL Cuttlebug. Here's a pic of all of the goodies I used. the Design Team has all sort of inspiration using felt, so be sure and check out The Cuttlebug Spot and please play along. Last chance for awhile. You might want to consider subscribing so as not to miss our return. Don't forget us!

Tiddly Inks Celebrate With Us! Challenge


WooHoo! Today is Christy Croll's Birthday! I'm sure you all know this, but Christy is the owner, illustrator, and all around fabby lady of Tiddly Inks and we're celebrating the day with a challenge in her honor. Christy's favorite colors are red, black and white so create a card with those colors (and a Tiddly Inks image) for our Celebrate With Us Challenge and you're IN! Christy has been in a creative frenzy with TONS of cool new images in THE SHOP and I thought I had this card all worked out until I saw this new one, Christine. It's Christy's self portrait so previous plans flew out the window so I could put the Birthday Girl (spelled out in Alpha Beads) herself on her card. She's colored with Copics and obviously came with me to my hair appt yesterday because she too, now has many more red highlights in her hair, LOL. (Honestly, you should go for it, Christy!)


I used my new Nesties Lacey Circles to create a Swing Card using the video HERE. I used Bo Bunny Sugar Dot paper, black peelie borders and my Dymo Label Maker for the outside sentiment.


As you open the card, that lacy circle swings around to reveal...


Wicked Fun! (Now don't we ALL want that for our birthday?) She's another of the NEW RELEASES available at the TI Shop (including some brand new Cute Girls, Gothic Cute Girls AND Gothic Pin-Ups and there's MORE!!!!!!! Christy has a yummy new freebie available on her blog HERE (so be sure to stop by, snag it, and leave her some birthday love) AND...


How about THIS?!!!!! There is a super SALE going on at the Tiddly Inks Shop right now! Today ONLY!!! with 25% off everything! Oldies, New Releases, Digi paper, YOU NAME IT! No minimums, no coupons, no restrictions...LET'S PARTY!!!!!


Monday, March 28, 2011

BBTB2 Disney Challenge and Blog Hop!


Woohoo! It's Blog Hop time again at BBTB2 and this week we're hosted by my dear and fabulously talented friend, Maria. In honor of Spring Break she's chosen a Disney challenge, hopefully using one of the new carts, but hey, any Disney cart will do. If you've come from dear Carole's blog you're on the right track, but if you'd like to start at the beginning, hop back to BBTB2 so you don't miss a thing. I really find the Disney characters intimidating so this is actually the first one I've actually cut and assembled. This is Figaro from Pinocchio on the new Disney Classic Cart. I love the surprised look on his face so I added the "Oops" sentiment by welding letters from Mickey Font. I added striped twine from the Twinery to the "O's" to make them look like balloons thinking this would make a cute belated birthday card.

It's a shaped front card (again) with a rounded rectangle from George welded in Design Studio. All of Figaro's layers were cut in white card stock and colored with Copics, even the black. Once I'd colored the other parts, the solid black card stock looked too one dimensional and I was able to add a teeny bit on shading coloring it all with my Copics even though it still was essentially black. The inside striped mat was from the DCWV Summer Glitter Stack from awhile back. Yikes! How bright! Definitely a kid's card, eh?


One this I find particularly challenging with the Disney characters is they are not particulary conducive to the type of dimensional layering I like to do. I thought I was gonna be okay with that, but after gluing on all the the features it just looked too flat to me. To remedy that, I actually cut apart the character using the layer placement cuts and popped the head, bow, paws and legs on top of the solid black cut and then popped the entire kitty on the card base. Definitely better, but wished I'd thought of this before I'd glued down the chest fur or that would be popped too. Next stop is Theresa's Blog and wait 'til you see the magical layouts she's created! WOW! but before you go, don't forget to leave a comment for a chance to win a $40.00, yes, you read that right, a $40.00 gift certificate to Custom Crops!!! Thanks so much Custom Crops for being such a generous sponsor. BTW, Custom Crops currently has the Disney Classics cart on SALE for on $27.00! In fact nearly ALL of the Cricut carts are on sale as well as regular Cricut mats for $8.00 and Imagine mats for $9.00 so be sure to check out Custom Crops for all of your Cricut needs.

Sunday, March 27, 2011

Macabre Monday Hacked to Bits Challenge (and Various Mother's Day Challenges...YIKES!) WARNING! Possibly Offensive!


Okay, before we even go there. I need to do a bit of a disclaimer. I was having a bit of a challenge with my Macabre Monday Hacked to Bits Challenge when I remembered this adorable image from Limited Runs Stamps. Little Madison with Hatchet, one of the Grimms, reminded me a bit of Lizzie Borden so...well, there ya go. What followed was a bit of my twisted humor which in no way reflects my opinion of my own Mom, or any Mom I know or have ever known so I really don't hope to offend here. Please blame the humor on WAY too much wine at Sunday Brunch and please forgive. The image included a collection of 6 of the images which I resized, then copied an pasted, until I got 54 of the little dears and then trimmed it down to 40. Then I made the computer generated sentiment and overstamped the whole shebang using the by Smeared Ink Inky Dreams Set in Aged Mahogany Distress ink. The sentiment was cut and matted using Nesties Labels Seventeen. I actually tried to hack my original attempt with an axe but it sort of made a mess, so instead I blew up the single Madison with Hatchet image and cut out just the hatchet to add to the front. The lovely roses are by Recollections from M's. Mom's Love roses!


Just in case you can't see some of the 40 little Madisons, here's a close up. Love doing my own DP! HeeHee!


And the beginning of the little Lizzie poem...


Now here's where I might be skating on thin ice. To whom would you send such a card? Well, all I could think about was Mother's Day, so here's the inside sentiment. Hoping I'm not going to lose followers over this! Check out s0me more Hacked to Bits Inspiration HERE AND because there are quite a few Mother's Day challenges out there I thought I'd stir up the pot a bit. (Besides, I've been dared by another of the Minions so ...) I'm also entering this in the following Mother's Day challenges (I'm not ALWAYS like this ladies, really, I'm not!): Simon Says Stamp, Mother's Day or Girly 2nd entry, Stampin'for the Weekend, One Stitch at a Time, Craft your Days Away, and I'm thinking I better quit while I'm ahead. Most are UK blogs and I'd hate to have my passport revoked.

Thursday, March 24, 2011

Tiddly Inks Picture Me Challenge


This week at the Tiddly Inks Challenge Blog we have a super challenge. Besides the gorgeous Photo Inspiration, you must combine it with a shaped card NOT using your Cricut. My initial reaction to this was "I'm glad I'm on Team B and not required to follow the challenge this week, LOL" but Lysa has done a fab tutorial and the photo is really beautiful so I thought "Hey, it's a CHALLENGE, get that butt in gear."


I've used Lysa's Style 1 using my Nesties Labels 10. The only difference is I cut an additional mat to glue on top to hide the fold. I pretty much do that with ALL of my shaped cards, including Cricut, because it gives me a sturdier base on which to pop my images. Next came another mat using DP from Me&My Big Ideas in the colors from the photo above. I chose Tiny Dancer for the image because her tutu reminded my of the flower puffs in the photo (and because it's one of my favorite songs). She's colored with Copics.
The sentiment is a REALLY old word stamp from a set called Rubber Stamp Poet by All Night Media. It's cut with the the smallest of the Mega Ovals large Nestie and matted with a Petite Scalloped Oval Large. Does anyone but me get confused by these names? the sentiment is popped with a 1/16" dot and Tiny Dancer with 1/8" dimensionals. for the flower, I layered pink and orange tulle and cut it with my Tim Holtz Tattered Florals die. These thick dies do work in the Cuttlebug by eliminating the A Plate and sandwiching the die and what ever you're cutting between 2 B Plates. The layers (6 in all) are secured with a sparkly Doodlebug brad. There's a little tulle bow at the top, and some amethyst adhesive jewels for embellies.


Come on, peeps, this is not that tough a challenge! There has been a change in the Tiddly Inks Challenge criteria requiring the use of TI images only, but there are FREEBIES to be had HERE, and if you don't have any Nesties, you can check out some of the there ways the DT has created shaped cards. Christy even has a freebie Template available on her BLOG, so there's just no excuse! Christy is also previewing the adorable new images available this week so what are you waiting for? I'm also entering this in the Simon Says Stamp Mother'sDay/ Girly Challenge. Don't think I could get much more girly than this! AND on the Simon Says Stamp and Show Blog the challenge is Show a WORD! Mine is obviously "Dance".


Wednesday, March 23, 2011

Bah! Humbug! Metallic Challenge


The challenge at Bah!Humbug! this week is Metallic. Easy peasy since I use foil card stock pretty often when doing Christmas so I wanted to try something new. My DH had recently asked if I could use a roll of adhesive backed foil tape and of course I said "yes!" Hadn't messed with it yet so I tried cutting it with my Tim Holtz On the Edge Snowflake die (another thing I'd not used yet) and voila! How cool! Peeling off the backing was a trip and boy is it STICKY! you really have to get it straight the first time and make sure the snowflakes don't curl and stick to each other or you're pretty much screwed (ask me how I know). It's also VERY thin but you can smooth out the bubbles carefully with a rub-on stick. What I loved is that the edges of the flakes sort of had a teeny raised edge around them. The flat edge bothered me so I took a Cuttlebug border and embossed it. My original thought was to use a peelie sentiment, but then I remembered the adhesive metallic words I'd gotten in the dollar bin at M's. Peace seemed to fit the bill and I only added a few adhesive beads for embellishment. It's really flat and an A2, but I really love how it came out. I think it has something to do with the gorgeous cobalt card stock I got at my LSS.

Here's the tape I used. Got lots more so I'll be experimenting further. The On the Edge Die is called Snow Flurries and I have no idea where the Cuttlebug Christmas border came from. An HSN bundle? Oh well... I'm still thoroughly loving the challenges at Bah!Humbug! Hope you guys aren't totally sick of Christmas...I never am. Well, maybe a little, but not enough to miss a Bah! Humbug! Challenge. (Shut up Margie, don't you dare say a word!) I'm also entering this into the CHNC Challenge which is Seasonal Silver (a little or alot) and the Winter Wonderland Challenge which is Embossing (heat or dry). Oh, and yes, you can use the On the Edge and all of the Sizzix Bigz (but not XL) dies in your Cuttlebug by eliminating the A plate and using a sandwich of B Plate, Die, Card Stock and B Plate.

Tuesday, March 22, 2011

The Cuttlebug Spot Buttons Challenge


Continuing our focus on embellies this month, our weekly challenge at The Cuttlebug Spot is buttons. I knew immediately I wanted to use the adorable La Mode dragonfly I'd gotten at J's awhile back and set about looking for a good embossing folder to use with it. I decided upon the folder from the Cuttlebug Friends Forever Card Making Combo and the "hello" sentiment from the Everyday Greetings set, both still available, and on SALE at Custom Crops. I fashioned antennae from fun wire I had strung though the holes in the dragonfly's body and took the colors from the wings and chose tiny buttons by Fabulous Findings (also from J's) to glue onto the embossed flowers. The sentiment was cut twice and glued slightly offset and I added a polka dot mat and it was done! Super simple but I love how it came out. Be sure to stop by The Cuttlebug Spot for more inspiration from the rest of the team. I'm also entering this in the My Partner In Crafting Crime Challenge which is conveniently, BUTTONS! WOW, short post! How about that?

Monday, March 21, 2011

BBTB2 Paisley Dachshund Challenge


This week our BBTB2 Challenge was chosen by our sweet Melissa in honor of her adorable pup, Spooky. We're using the dachshund cut from the Paisley cartridge, but if you don't have Paisley, choose another dog from any cart to play along. I wanted to try something different than my usual and was inspired by the sentiment I chose. I decided to make a sort of "missing you" card for my good friend and next door neighbor who dissappears from January 1st through April 15th because she's a tax attorney and estate planner. I cut two of the dogs but in this case I didn't weld them.

I did my usual multiple layering including adding glasses, also from the Paisley cart. The embellies included Prima flowers and adhesive pearls and I scored the edges of the doggie sweater with my MS Score Board to make it look more like ribbing. Because the shadows are so BIG with the Paisly cart, I decided to doodle around the entire thing. As you can see in the pic, the shadow and regular layer of the front dog is actually cut apart.
So the card could open and expand. The hard part was figuring out how to keep it closed. I cut two of the sweaters and trimmed them so the back part could slip under the front part of the sweater and the front could slip under the back ribbing. Inside I added an accordian pleated strip attached to the center of the back and to the edges of the front dog at the edges where it is cut apart.
Full opened, you can read the sentiment which is how this card came about. Ya think she'll get it? I used Plantin Schoolbook Roly Poly font (my fave from that cart) and cut them twice and glued them slightly offset because that font has no shadow. I couldn't get a pic with the card fully extended because it was too long. Cloes the card is (about 9 x 5 1/4" closed and almost 20" wide when fully extended.) I really was hoping I could fit it in a legal envie, but cutting the dog any smaller (she's cut at 4 1/2") made the inside expandable strip too narrow and fragile. As it is, it's only 1 1/2" wide by 11 inches long. Fortunately it will be hand delivered. LOL Now go have a peek at BBTB2 at the fabulous project by the rest of the team, and remember, you have 2 weeks to complete our challenges. Hope to see you play along. I"m also entering this in the Fairlytale Challenge Blog where the theme is green and pink.

Sunday, March 20, 2011

Macabre Monday Dastardly Divas


This week at Haunted Design House we're focusing on Dastardly divas. You know, those who still manage to look ravishing while performing acts so vile and vicious they would make Dracula blush. Well take a look at Ivy by our fabulous sponsor this week Barbara Jensen. Eiyiyi! I call her Poison Ivy so don't let those looks fool you. She'll give you an itch NO ONE can scratch. (Well, maybe...LOL) She's colored with Copics and cut with my Nesties Labels Seventeen which I then inked with Crushed Olive, Shabby Shutters, and Forest Moss Distress Inks. The sentiment was computer generated and cut with Labels Fifteen. I used my MS Laurel Leaf border punch and colored just the leaves with my Copics and did the same for the sentiment mat which started out the same color as the Bazzill card base. The DP is K & Co but I don't know which stack because the cover is ripped off. The cool beads are K & Co as well.For more fabulous inspiration visit the Minions this Macabre Monday and be sure to check out Barbara Jensen's fabulous images to see what you could win if you play along.


I'm also entering this into some new challenges for me: the Cardmadfairy's Back to Nature Challenge, the Fab 'n' Funky Challenge "All Things Green", and the Creative Card Crew Challenge Show us some green. Thanks Teri for the links!

You're Just My Type


Instead of working on DT stuff I'm here screwing around on some "just for fun" challenges. First is Gingersnap Creations Random Redhead challenge which this week is typewriters. (Ya didn't think I'd let THAT one go by, did ya?) I KNEW I had some Graphic 45 paper I hadn't used so I was all up for this one and figured I could make a quickie. The typist and typewriter images are from the Communique Collection and the typewriter keys are punch outs from the Domestic Goddess Collection that I covered with clear epoxy stickers from J's. I designed a quick frame for them in Cricut Design Studio using George and then a tab from the From My Kitchen cartridges and printed it on my computer and stapled it on. Both the receipt and tiny calender are Tim Holtz Traveler Tissue Tapes (on SALE now at Custom Crops!)
The frame and keys are popped for dimension on a 5 1/4" square card. The corners are rounded with my Cropadile Corner Chomper. I'm also entering this is the Little Red Wagon Challenge which is Office Supplies. Finally, I'm entering this in Guest Designer Michelle's Challenge On Yvonne's (Do More With Less)Blog which is to do something out of your comfort zone. I'm a Cricut cutting, Cuttlebug embossing, stamp coloring kinda gal so I RARELY make a card that I "assemble" using primarily images, stickers or punch outs, etc that I didn't make myself. Okay, there's a little Cricut, but hey, you can't tell me that this looks remotely like my usual style. LOL
On Friday I scored BIG TIME at the Pleasanton Scrap Expo. All day yesterday I was lamenting the stuff I DiDN't get because I ran out of time but when I unpacked it all...HOLY SMOKES! I'm surprised my credit card didn't self destruct! So I'm outta here. Back to working on BBTB2. Yes, I ALWAYS wait 'til the last minute.